Reflecta x120 Scan test report
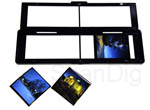
In November 2015, Reflecta introduced the x120 Scan to the market, the company's first medium format scanner built around a CMOS-chip. Thereby, the well known medium format scanner Reflecta MF5000 got a little brother. Now, the company offers two medium format scanners in its product portfolio. In comparison to the MF-5000, you will notice one mayer technical difference right off: The x120 Scan is a stand-alone CMOS scanner. The engineering behind it should therefore rather be titled as photographing than scanning.
Thus, no more than a SD card is needed for digitizing film with the x120 Scan. Whilst the MF-5000 has to be connected to and operated via computer, the x120 works independently, just like a digital camera would. Only after digitization a computer is needed, in order to copy, display and edit pictures. In the following short test review, we're going to shed some light on image quality and see how that matches up with the results of cheap flatbed scanners with integrated transparency unit.
The Reflecta x120 Scan has been taken from the market in May 2021. There is no successor for it.
Accessories, performance characteristics and scope of deliver
Let's first take a look at the scope of delivery. The x120 scan comes with a single film holder which handles all 5 formats (4,5 x 6 cm, 6 x 6 cm, 6 x 7 cm, 6 x 8 cm und 6 x 9 cm), that can be digitized with the unit. Besides, a cleaning brush for the slide-in, a USB cable and a mains adapter are included.
The only printed guide supplied with the scanner is a quick start guide, present in 6 languages. The actual manual is located on the CD, together with the image editing software Acrsoft MediaImpression 2. All this is packaged in a compact cardboard with the size of 15 x 20 x 30 cm.
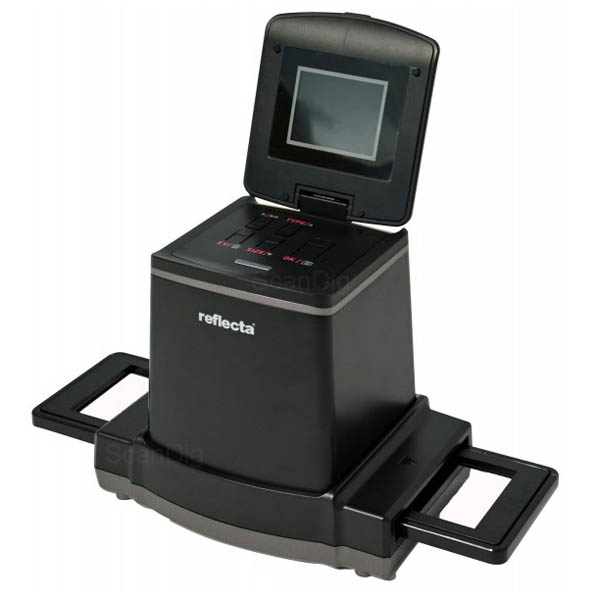
The reflecta x120 Scan is advertised to have an optical resolution of 14 megapixels. After all, this is more than most cell phone cameras provide, yet much less than professional film scanners will get you. We'll answer the questions concerning image quality in a seperate chapter of this review. There, we shall also find out whether or not the scanned picture truly offers 14 megapixels of content and see if the contrast ratio achieved by the incorporated 12 white LEDs is sufficient. As we mentioned earlier, no computer is needed for the x120 Scan to work. The scanner will take SDHC memory cards with up to 32GB (none of which is supplied in the scope) and is operated through five simple buttons on a 2,4" TFT-LCD display. The included mains adapter has an output of 5V / 1A. At 600g, the x120 Scan is a real featherweight; it won't take up much space on your desk, neither. Since the device actually takes pictures instead of scans, the stated scan times of one second are not surprising.
Installation, start-up and scanning with the Reflecta x120
Once the scanner is unpacked and powered up (either through USB or the mains adapter), all that needs to be done is insert an SD or SDHC and the deivce is ready to go. The provided software Arcsoft MediaImpression 2 is not necessary for scanning. We'll go into details about the software later on in chapter Supplied software.
To access the control elements of the scanner, it has to be unfolded at the top. Then, display and operating elements can be reached. To power up the scanner, press the longated, narrow, silver button. If you connect the x120 Scan to a computer via USB, a dialogue will open asking to copy data from the SD card to the PC. If you wish to scan, choose No and then press the i>OK button. The x120 Scan uses few english words; the operating language cannot be changed. The display shows a live-view of the well, ie. the same frame that will be captured later on.
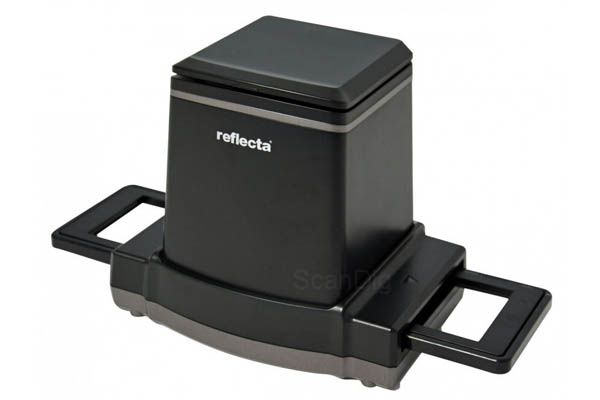
The size of the film holder gives the impression that 6x12cm frames can be handled by the scanner. This is not the case, though. The maximum frame size is 6x9cm. Thus, a maximum of 4 images sized 4,5x6cm to 6x6cm can be placed into the holder. Alternatively, two pictures the size of either 6x7cm, 6x8cm or 6x9cm. It shall be noted that the x120 Scan is intended for medium format film strips only. 35mm film cannot be digitized.
Since the scanner does not offer automatic dust- and scratch removal, the film material has to be carefully cleaned beforehand scanning. For this purpose, we advise the use of a Kinetronics anti static brush SW-060. Using this, lint and dust can be easily brushed off the picture. In addition to cleaning the film material, the use cotton gloves and tweezers is adivsed. This way, the film is protected from additional pollution.
Opening up the film holder is easy. It's held together by three magnets. If you click on the alongside image, you will see the procedure illustrated in an animation. Sadly, arched images won't be stretched properly, causing unsharpness at best. Sometimes, the film will move horizontally after being placed into the holder. An arrow and a circle illustrate how the film holder is to be placed into the scanner. While moving the film holder inside the scanner, the display shows a live view. This way, proper alignment is assured.
Through the button type, the user may choose the kind of film material. Options are diapositive (REV), color negative (NEG) and black and white (BW). The current size of medium format - 5 options give - is chosen through the key with white arrow pointing downward. The exposure is set using the EV key. It can be set in increments of 0.5 (probably f-stops) between +2.0 and -2.0. While changing settings, the exposure will be simulated on the display. However, we found this simulation to be somewhat inaccurate. Once all settings have been made, the scan is started by pressing the OK key, next to the tiny camera symbol. This will take about five seconds. Then the scanner is ready for the next picture.
The 16GB SDHC memory card we used in our tests provides enough space for either 7590 pictures size 6x9cm, 8630 pictures size 6x8cm, 9710 pictures size 6x7cm, 11110 pictures size 6x6cm or 15500 pictures size 4,5x6cm. The file format is restricted to .jpeg. A typical image file will have a size of about 1.5- 2.5 MB.
The film holder of the x120-Scan can be purchased seperately, as well. We recommend the usage of several film holders, as this will enable you to equip one film holder while the other is being processed, thus, easing the scanning process and raising efficiency. The film holder for the reflecta x120-Scan can be purchased in our online shop.
Supplied software
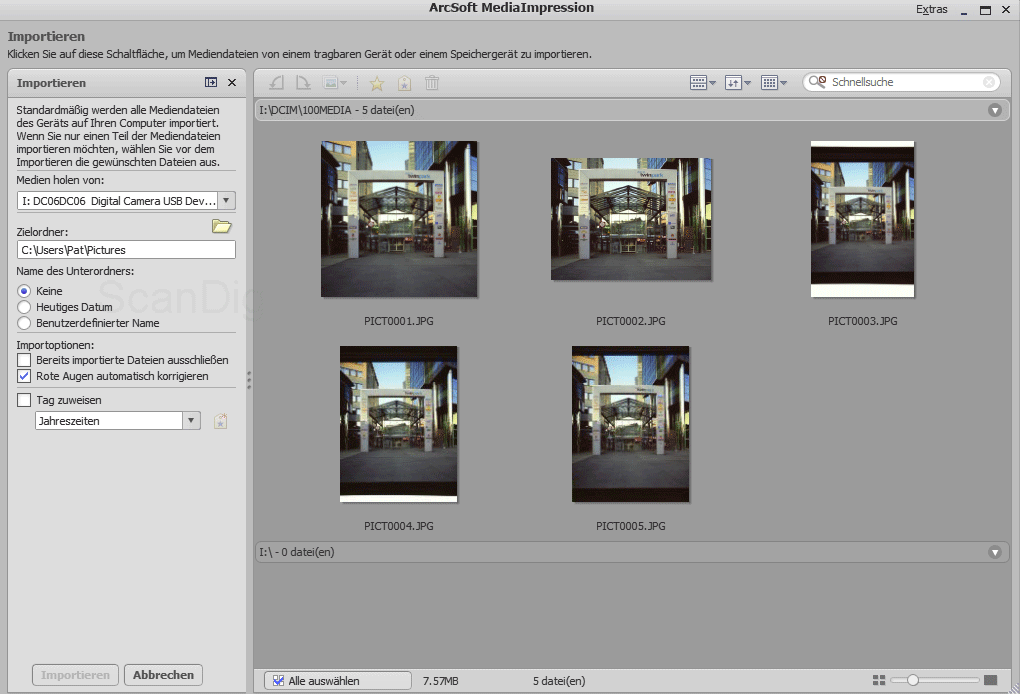
No software is necessary for scanning. Just like the other x-Scan models, the x120 Scan ships with the image editing software Arcsoft MediaImpression 2, which will be used for transferring the images from SD and editing them. Alternatively, the scanner can be connected to the computer via USB cable. Once you turn on the scanner, the display will promt do you want to transfer data from the SD card to your computer?. The arrow keys can be used to choose Yes, followed by pressing OK. Next, an explorer window will open on the comuter, displaying the contents of the SD-card.
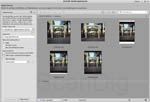
Inside Arcsoft MediaImpression 2, the contents of the SD card can be accessed and transferred to the computer using the button import. Prior to import, images may be turned, labelled, rated and catalogued. Once the pictures are chosen, they can be saved to any given location on the computer. The advantage of this method: the date of the pictures matches with the image editing programm. If the images are transferred through drag-and-drop from the SD card, the date of all files automatically reverted to 10-01-01. This is due to the fact that no date can be set up in the scanner.
Some simple editing can be done in Arcsoft MediaImpression 2. Presentations can also be created using the software. Sending emails or uploading to facebook can be done directly from the software as well.
Since the post production capabilities of Arcsoft MediaImpression are rather limited, we recommend the usage of a proper image editing software such as Adobe® Photoshop® Elements. This will provide a much more diverse portfolio of editing tools and more precise means to do so.
Conclusive, we'd like to note that - unlike flatbed scanners and other film scanners - there is no alternative scan software available on the market for the x120 Scan. This is due to the fact that the x120 Scan actually is rather a camera than a scanner. And cameras typically run on the software they come supplied with, not a custom one.
Image quality of the reflecta x120 Scan
We already described how quick and easy scanning of medium format film is using the reflecta x120 Scan. But what about image quality? The producer claims an optical resolution of 14 megapixels. A medium format with the size of 4.5x6cm should hence offer a resolution of 4300x3200 pixels. However, the scans from the x120 Scan offer only 2176x2848 pixels. This equals barely six megapixels. Let's find out the real resolution using an USAF-Target.
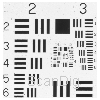
Evalution of the resolution target is aggravated since the output file format is .jpeg only. It's certainly a reference value, since scanning will always suffer from jpeg compression. In the scan of the USAF test chart, we can only just make a difference between the horizontal lines of the element 4.1 and the vertical lines of the element 4.2. According to our resolution chart, this equals an effective resolution of 860ppi. When scanning a 6x6 cm image at 860ppi, the resulting file has 2031x2031 pixels. This is equivalent to four megapixels. Compared to the advertised resolution of 14 megapixels, the reflecta x120 Scan yields a mere 30% of the nominal resolution. This is a very low value compared to other film scanners. Now, let's see about the practical use of 2031x2031 pixels. What print size can we expect at a printing resoluion of 300 dpi? It's a rather modest 17x17 cm. To view the image on full HD television (1920 x 1080 pixel), the resolution is quite sufficient.
If you compare the achieved resolution of 860 ppi to the flatbed scanner Canon CanoScan 9000F Mark2, which ranks in the same price range as the reflecta x120 Scan, the difference becomes obvious. With an effective 1700 ppi, the Canon achieves pretty much exactly twice the effective resolution as the reflecta x120 scan. This means 4 times more picture information. The flatbed scanner Epson Perfection V800 Photo, available for a little more than double the money, yields an effective 2300ppi. This is almost three times as high a value as the reflecta x120 Scan. Finally, let it be noted that the bigger brother of the x120 Scan, the Reflecta MF5000 will get you an effective 3050 ppi, which is four times as much as the x120 Scan. Now what does this mean? While you will get a mere four megapixels from a 6x6 cm medium format image using the x120 Scan, the MF5000 will deliver more than 40 megapixels. That's ten times as much data!
The effective resolution of the reflecta x120 Scan accounts for a mere 860 ppi. While this is sufficient for watching the scans in high resolution on the screen - it's certainly nowhere near enough for high quality prints or blow-ups.
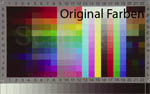
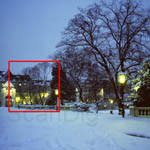
Not only resolution, but also color rendering, dynamic range and image noise are relevant for the image quality. There is no way to influence the scan by means of IT-8 calibration or another kind of color correction. Corrections can only be made afterwards during post-production and require saving the images again (resulting in a renewed loss of information due to jpeg compression). Therefore, accurate color rendering is vital. For illustration purposes, we scanned an IT-8 Target. Since this target has fixed color values, it's a realiable way to assess the color rendering. By clicking on the adjacent picture, you will get an animation showcasing the original scan and an image with corrected values. Here you can see that the x120 Scan has a small range of contrast, making the scans look dull. Also, all scans show a greenish color tint.
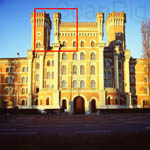

Next, let's have a look at scanned slides. We scanned two 6x6cm slides and one 6x8cm slide. To evaluate the quality, the image has to be inspected at 100%. This way, each pixel can be seen. If you click on one of the pictures in this section, a marked clipping will show you cleary just how stong the compression is. Due to small compression artefacts and low resolution, fine details are inevitably lost. High-contrast borders are not pictured clearly.
On top of that, we need to point out the very obvious and unsightly clinching of the images - the degree of which being dependent on the aspect ratio of the image. The smaller the image, the greater the clinching. If you care about a correct aspect ratio, you should consequently scan at 6x9 cm size, even if your material is actually another size. You can still trim the edges later during post-production. This will, of course, come at a minor disadvantage: The exposure control takes the entire 6x9 cm into account, possibly leading to over- or underexposure.
Comparing the image quality of the reflecta x120 Scan with a higher quality medium format scanner such as the Reflecta MF5000 or a high class flatbed scanner such as the Epson Perfection V800 Photo, the reflecta x120 Scan comes off badly. Taking into account the low price of the device, the image quality somewhat measures up to our expectations.
The image quality of the reflecta x120 Scan is not sufficient for archiving medium format film. Neither should the scans be used for high-end applications. For presorting or quick email dispatching, the scans are entirely sufficient.
Concluding, we have to point out that - unlike almost all film scanners and proper flatbed scanners with transparency unit, the reflecta x120 Scan does not offer automatic dust- and scratch correction. This certainly limits image quality greatly. Due to the low effective resolution though, small dust particles won't even show in the digital images.
Scanning speed of the reflecta x120 Scan
We used a customary 16GB SDHC memory card with a transfer rate of 15MB/s for our test. As you can abstract from the chart below, none of the actions performed takes more than a few seconds. Since the user is presented with a live view while inserting the film material, the prescan passes off in real-time. The main scan takes only a few seconds to transfer to the memory card, and can be followed up by another scan right off.
Due to the small images size, transferring data to the computer is very quick, too. In our test, a total of 50 images represented 78 MB. Transferring the images to the PC using Arcsoft MediaImpression 2 took longer than transferring via drag-and-drop in windows explorer (though 18 seconds can hardly be referred to as long). The time difference between the two transfer methods is probably mainly due to the changing of creation dates of the files.
Of course, there is no difference in time between scanning a negative and a slide. Neither does the image format affect these values.
| Procedure |
duration |
| Preview |
Live-View |
| Scan |
5 seconds |
| tranfer of 50 image files using the SD-card slot of the PC |
4 seconds |
| transfer of 50 image files through Arcsoft MediaImpression 2 |
18 seconds |
Due to the very fast scanning speed, the reflecta x120 Scan is particularly suitable for quick scanning of medium format pictures. Considering the scanning time of just a few seconds, bear in mind that loading and positioning the film holder takes a multiple of this time.
Summary, conclusion
The reflecta x120 Scan is best suited for quick generating of digital contact sheets, screening medium format negative film and the occasional scanning and emailing or uploading to social networks. For high quality scans or archiving needs, there's no getting out of using a proper film scanner such as the Reflecta MF 5000 or a professional scanning service.
Back to the film scanner tests index
|
)
)