Test report Datacolor Spyder5Pro screen calibration
"My pictures are all bluish and much too dark, what can I do?" We regularly get such phone calls from those clients who either bought a scanner in our Film scanner-Shop or who had digitalized their old archive of slides in our Scan-Service. Our first question is always: "Is your screen calibrated?"
And in almost all cases the answer is: "No, what for, and what is it at all, a screen calibration?" or "This is much too compplicated and also very expensive!" In the next chapters we will show on the basis of the Datacolor Spyder3Pro that a calibrated monitor is a condition for the exact colour reproduction in the digital pictures and that such a calibration neither is complicated nor much too expensive.
General basics about the screen calibration
The objective of a screen calibration is the right reproduction either of the colours as also the brightness and the contrast of the monitor. But many users think that this is achievable with the visual adjustments of the screen in which a model picture is simply compared with the representation of the screen and the determined deviations are corrected with the different controls of the screen menu. This might work exactly with this picture, but in the case of another picture, this subjective adjustments can lead to completely wrong colours and the picture can get much too dark. The human eye is not able to differentiate the intensity of the different colour channels.
It is only possible to achieve a configuration that is applicable for all pictures if the colours, brightness and contrast of the screen are objectively measured with a measuring instrument, a so-called colorimeter. But merely the measuring would be meanless, as the obtained valuehave to be compared with the reference values and the differences must be detected. The result is saved in an individual ICC profile that exactly matches the screen and that during the start of the computer is straight loaded to the graphical card and therewith provides a correct screen representation. This was briefly the theory. The practice is as follows:
1st Step: Before starting the calibration, the monitor should be put back to the factory condition (e.g. the brightness turned up to the top would not permit any correction upwards).
2nd Step: Depending on the monitor and the colorimeter in use, the colour temperature and the gamma value can be determined with the predetermined values and also individually. The colour temperature determines the warm impression of the picture and the gamma determines the brightness of the medium colour shades.
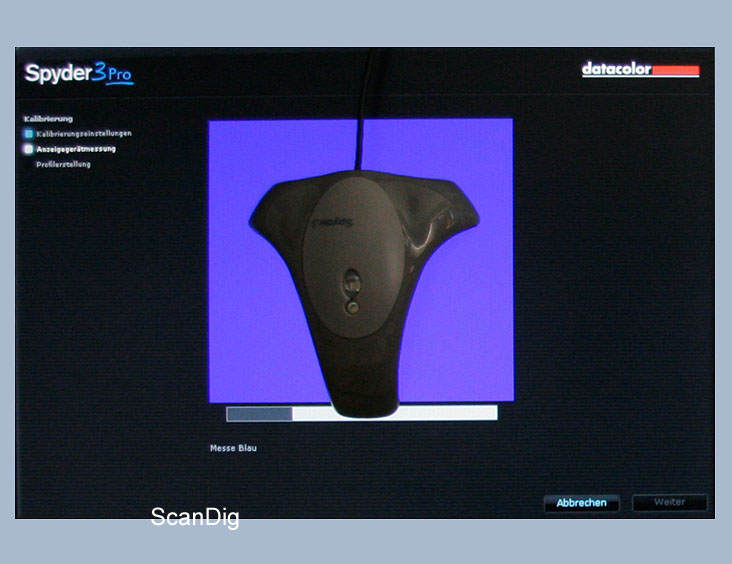
3rd Step: The colorimeter is positioned on the screen surface and measures the colours represented by the software in a window. Then the measuring data are compared with the reference data and by this way, the difference is detected.
4th Step: The differences between the desired colour shades and the measured colour shades are saved in an ICC-profile that represents an individual correction profile exactly for this screen.
Due to the reason that the computer screens are exposed to quality fluctuations, it is recommendable to repeat this procedure, for example once a month. Thus, a regular calibration of the monitor is the condition, either for authentic colours as also for a professional colour management. On our Colour management site there is detailed background information.
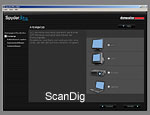
Scope of delivery and installation of the software
After we shortly introduced you to the basics of a screen calibration, we will now dedicate to the actual topic of this report that is the exact description of the procedure based on the Datacolor Spyder5Pro. In the year 2007, the firm Datacolor took over the firm Colorvision and in the end of the year it introduced the third generation of the Spyder calibration tools into the market.
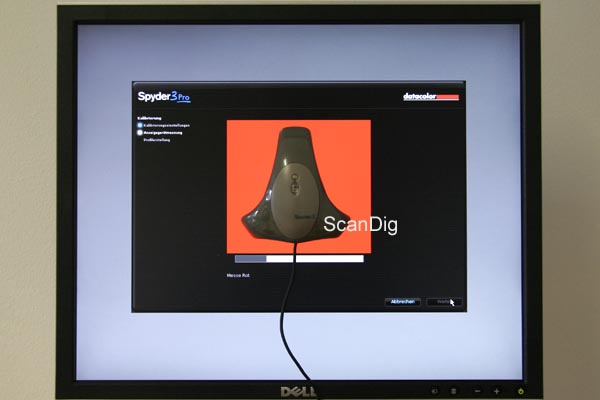
The fact that it is really a new generation is first demonstrated with the smaler packaging, the size, and also the design of the colorimeter. Compared to the Spyder2, it is a third smaller than the previous one and it has an elegant design and ergonomic shape. Also new is the Spyder5 Desktop Cradle with an integrated Stativgewindetripod socket in which the colorimeter is put for measuring the ambient light or for keeping it whilst not used. Beside the programe software and a quick instruction, there are some cloths for cleaning the screen included in the scope of delivery. A wise addition, as a dirty monitor can falsify the measuring result.
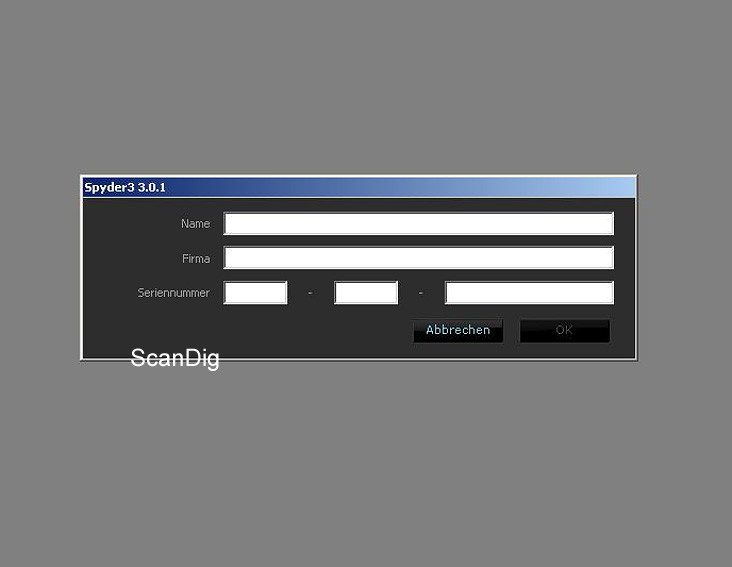
The installation of the software is simple and done in a few minutes. There is the possibility to choose between several languages, beside German also English, French, Spanish and Italian. Once the installation is accomplished and the computer restarted, the program Spyder5Pro is opened and one is required to put in the name and the serial number. This number is obtainable from the folder of the software-CD. After the input one has the possibility to get registered in Datacolor. This is certainly not a condition for the caliration but very useful as by this way, one is always informed about the newest updates of the software.
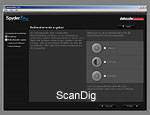
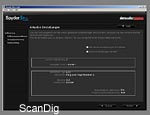
Preparing the calibration - menu "edit display unit"
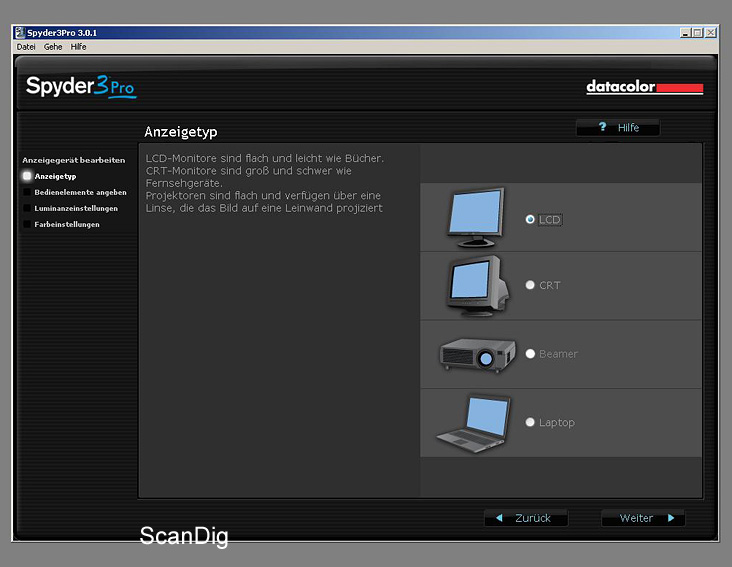
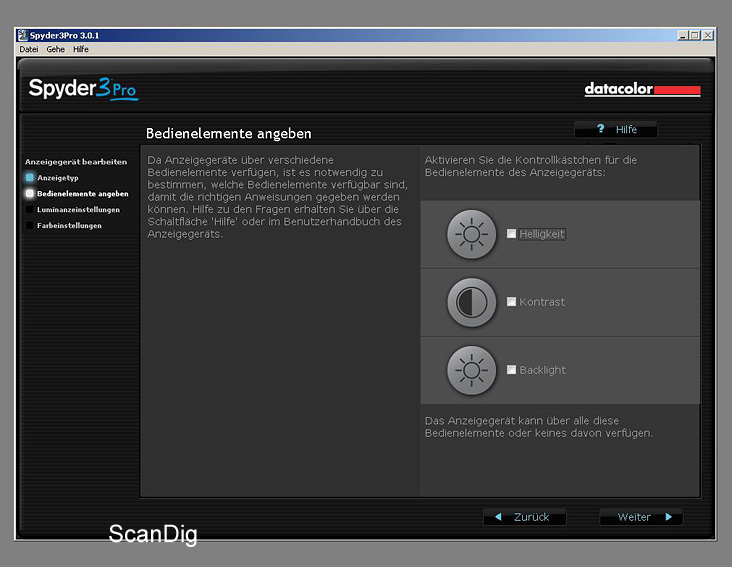
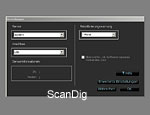
Now one gets into the menu "Edit display unit". At first, the kind of display unit must be indicated and one has to choose between LCD, CRT, beamer and laptop. For those who do not know these terms or do not know the difference, the options are also visually represented. In the next step one is required to specify the different control elements that are available in the menu of the monitor: brightness, contrast and backlight.
In the case of most of the monitors, the brightness and the contrast are adjustable, in the case of very good LCD-monitors also the backlight. But only the adjustable elements should be clicked, as this is the only way the software assistant can give the instructions correctly. by choosing at least one control element, one is asked to put the monitor
back to the factory settings in order to get the initial position for the calibration. Most of the display units have a reset or a recall button for this in the screen menu, and/or one is instructed in the manual how the device can be put back to the factory setting.
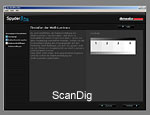
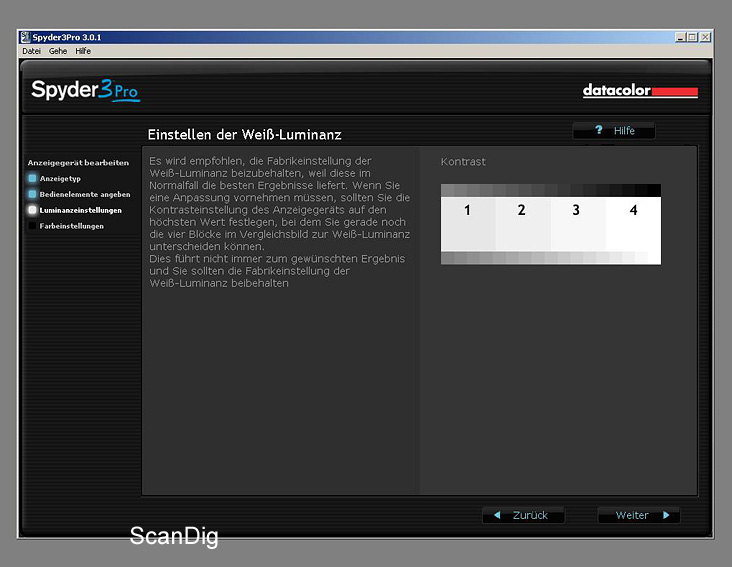
In two steps, the brightness and/or contrast adjustsments are revised again on the basis of the white luminance (brightness) and the black luminance (contrast). This happens by means of a picture for comparison with 4 blocks of different grades of brightness. The white luminance assures that the monitor is bright enough in order to recognize the display, but also not much too bright so that the details of the bright areas get lost. To the contrary, the black luminance controls if the black level is low enough so that the display shows the black colour as dark as possible without loosing any details in the shade areas. If all four blocks are distinguishable to each other, the luminance is rightly adjusted (most of the times, this is achieved by putting the monitor back to the factory settings). If this is the case, the white luminance and/or the black luminance has to be adjusted over the brightness and contrast control in such a way that the four blocks can be distinguished. Even though the desired result is not achieved, the standard values are readjusted.
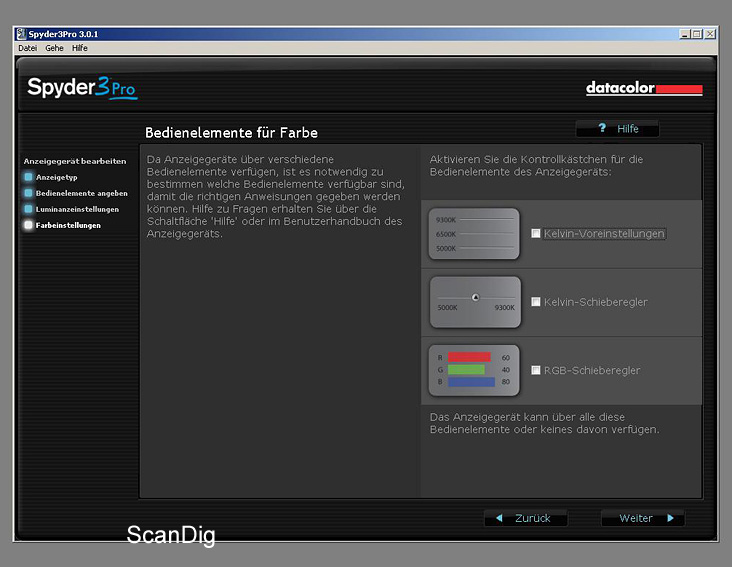
In the last step of the menu "edit display unit" there is to specify how the colour temperature can be adjusted in the menu of the monitor and the level this value should have: through a choice of certain kelvin values, with a kelvin slide control or over a RGB-slide control. In the screen calibration, the colour temperature is also called white point and it determines the white colour shade. Some might say now that white is white and not a colour. But it is not like that, also the white colour can generate a certain "warm impression". With a low colour temperature the white seems redish, with a higher temperature bluish. As a standard, the monitor calibration is established in a temperature of 6500 kelvin, that corresponds more or less to the daylight at noon time. In case it is worked with other values (modifiable in the menu "calibration", see next chapter) these should also be stated. The adjustment of the white point is also possible with the RGB-slide control, but this should only be applied by very experienced users!
What is still to me mentioned is that the menu "edit display unit" is omitted by restarting the software Spyder5Pro and one gets straight to the menu "calibration". If one wants to accomplish some modifications for example if one connects another monitor to the computer with other possibilities of adjustments in the menu, over the main menu bar it is possible to call up the menu "edit display unit".
Accomplishing the calibration/profiling
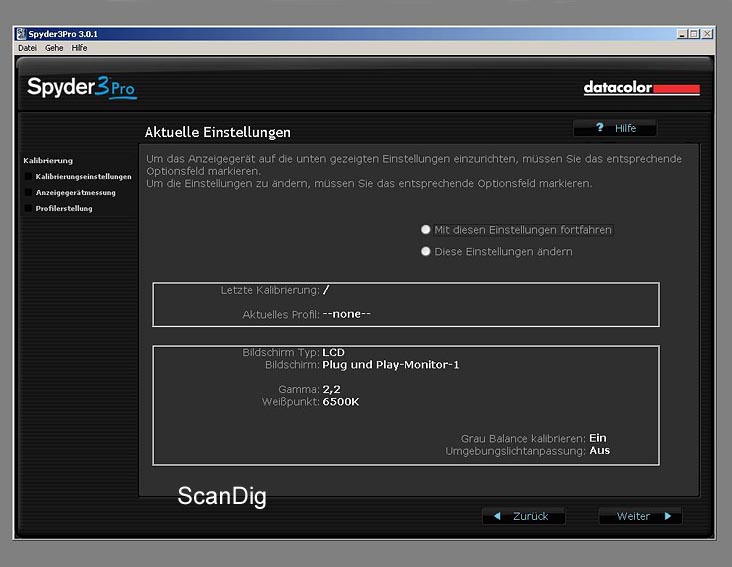
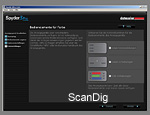
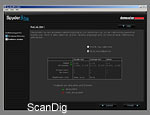
After now all neccessary details concerning the adjustment possibilities of the screen are communicated to the calibration software, the actual calibration follows. In a field of view the current adjustments are shown:
- the date of the last calibration (in our case no date yet)
- the current profile that is assigned to the monitor (in our case no profile yet)
- the kind of monitor(LCD, CRT, laptop or beamer)
- how the monitor is described in the software (as a standard, "Plug and Play-Monitor-1" is displayed)
- to which gamma and at which colour temperature the monitor should be arranged (as a standard, a gamma of 2,2 and a colour temperature of 6500K is displayed)
- if a measurement of the ambient light should be accomplished (as a standard "off")
- if a grey balance calibration should be accomplished (as a standard "on")
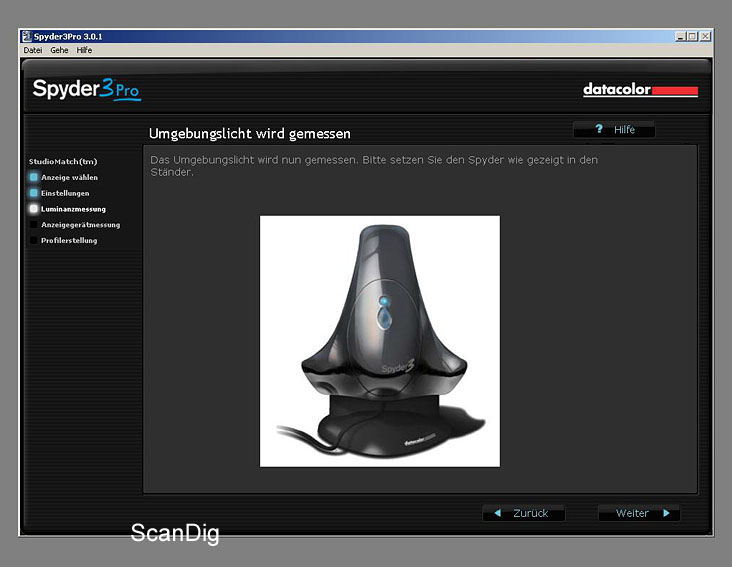
Explaining the last three points: Normally, a gamma/colour temperature - combination of 2.2/6500K that provides a good result in most of the cases is recommended. But the condition for this is that the lighting conditions in the working place do not change much in the course of the day. But if this is the case and an exact colour fidelity is required, it can be necessary to choose another value for the colour temperature. Which one it is can be determined with the Spyder5Pro by measuring the ambient light.
To achieve this, one puts the colorimetre that is connected to the computer over an USB-cable into the Desktop Cradle that is included in the scope of delivery and by means of a sensor at the front part, the ambient light is measured. Depending on the result, one is required either to keep the value of the colour temperature or to modify it respectively and/or even to change the current light situation in case it is not apt for a true colour operation (e.g. straight sun radiation on the monitor). The calibration of the grey balance is the best choice for the LCD-monitors, laptops and beamers. Only in case of the CRT-monitors, this function is not necessary and can be deactivated.
The current configurations can be modified in the option field "change adjustments". If the current values are suitable, one clicks on the button "Continue with these adjustments" and gets by this way to the core of the calibration that is the measurement of the dispplay unit. The Spyder5Pro is connected to the computer per USB-cable (in case the ambient light measurement was not accomplished previously) and positions the colorimeter to the centre of the screen.
For the facilitation, the software shows where exactly and how this has to be accomplished. In case of a CRT-monitor, the Spyder5Pro is rightly put on the glass surface with a plug and in case of all the other types of monitos the suction cup has to be removed and the colorimeter is positioned right on the screen. Some sponge rubber platings avoid that the surface is scratched. In order to avoid the dropping of the colorimeter, there is a counterweight fixed at the USB cable that, from the backside of the monitor, counteracts against the gravity of the measurement system. It is important that the monitor warms up at least for half an hour and that the screen saver and the energy management are deactivated and therewith a switch or a switch off during the measuring process is avoided.
Now the software starts to represent colours and grey colour shades in the window where the colorimeter has been positioned. First some different shades of the colours red, blue, green and then different grey shades. In the first calibration of the monitor this procedure takes about 5 minutes. After that, the software compares the measured data with the must values and issues an individual ICC profile that exactly corresponds to this monitor. In every start of the computer, this profile is then loaded straight on the graphical card and provides a correct representation on the screen.
Here, I would like to point out that by loading the profile on the graphical card "only" the calibration of the monitor takes place so that the brightness, contrast, colour temperature ect. correspond to the desired must values. The actual profiling for the representation of the true colours takes place in application programes like Photoshop®. Only the colour management capable programs like Photoshop® can process the information contained in the ICC-profile; a simple web browser cannot.
One has the possibility to give this profile a self defined name. What is recommendable is to include the date of issue into the profile name, this facilitates finding the right profile after the later changes of the profiles.
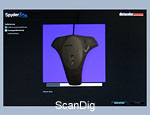
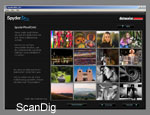
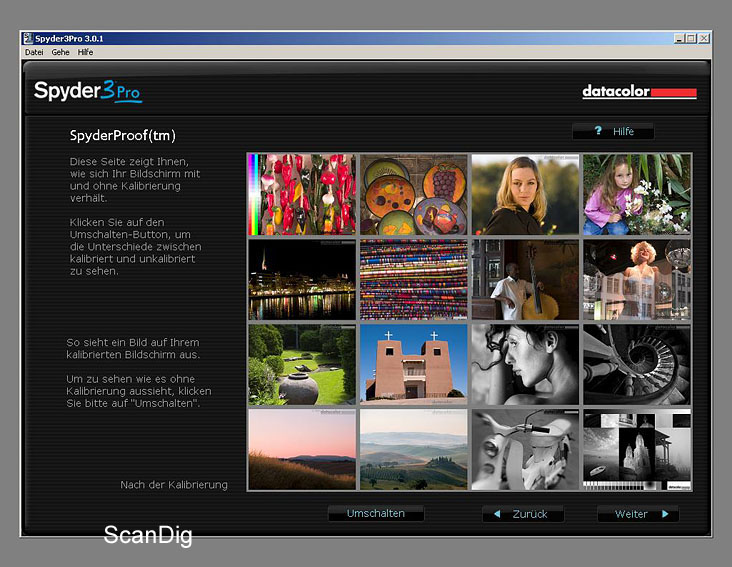
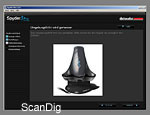
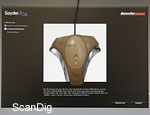
In the next step one gets the possibility to compare the modifications done through the calibration. The software tool "SpyderProof" represents 16 different text picures, from the landscape image to the personal portrait up to contrasty black and white images and enables the switching between the not calibrated and the calibrated screen representation. In most of the cases, a significant difference! Now, the monitor calibration is finished, the colorimeter can be removed from the screen and the software can be closed.
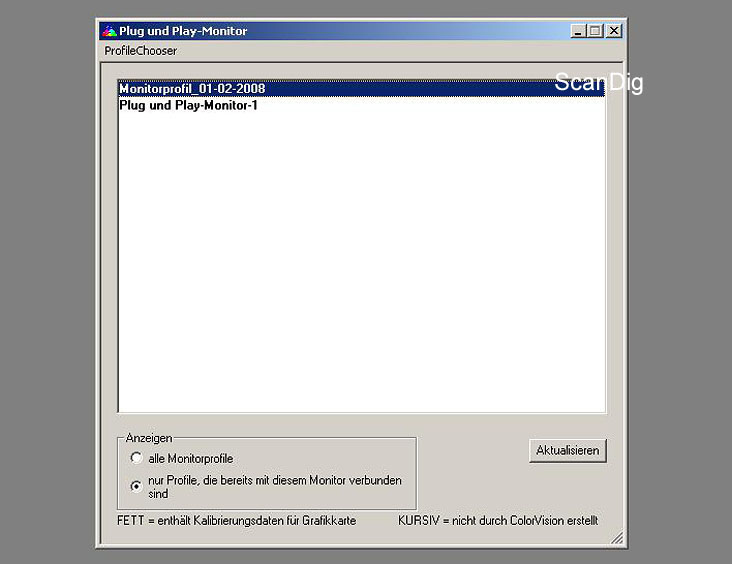
Software tools CheckCAL, ReCAL and profile-chooser
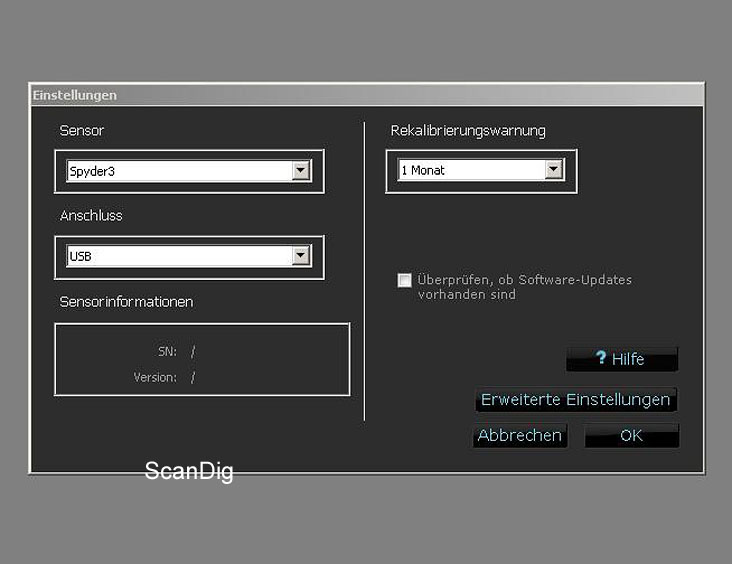
What is important now is that the configurations in the monitor (brightness, contrast, etc.) are not changed anymore. After every intentional or non intentional modification of these values, a new calibration is required. As the colours and the brightness of the screen are exposed to a temporal fluctuation, a regular revision and eventual recalibration is recommendable, normally about once a month. In order not to forget this, in the main menu of the software it can be choosed in "settings" in which time interval a reminder for the calibration is sent, e.g. one month after the latest calibration.
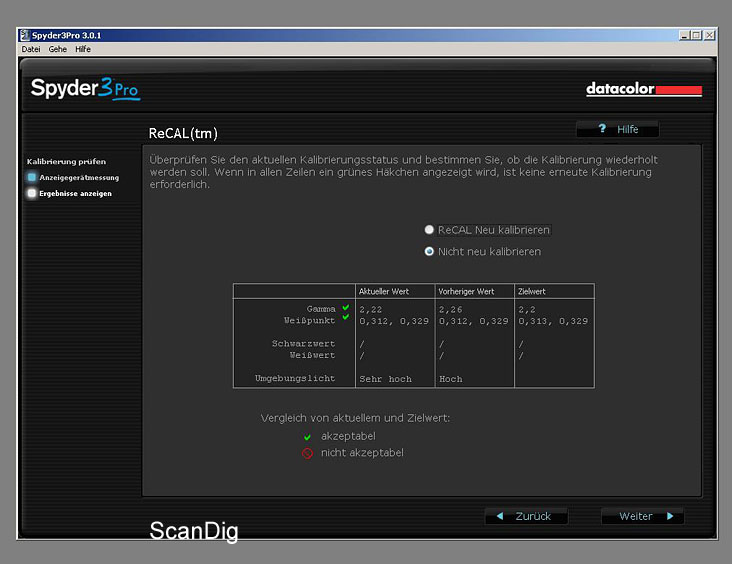
By opening the program Spyder5Pro, one can, and this is new and very beneficial in comparison to the Spyder of the second generation, check the accuracy of the current profile with the software tool CheckCAL and if a new calibration is necessary. this takes only one minute of time! But also in case a recalibration is needed, with the software tool ReCAL, the time for this will be reduced to approximately 2,5 minutes. Thus, in both cases, a fraction of the time needed to correct all the images that, due to not having checked the monitor representation for a couple of months, have been wrongly processed during the last months.
In the previous chapter we already mentioned the change of the monitor profiles. This makes sense and/or is even necessary if at the computer workstation the light situation strongly fluctuates and different profiles have to be generated in order to provide a permanently equal colour representation. For this case, the software Spyder5Pro has the software tool Profile Chooser integrated that can be comfortably started from the desktop as a stand alone program. In a window, all monitor profiles contained in the computer are optionally shown or also only those that are linked to the currently connected monitor. By this way, in case of a changed ambient light, the suitable monitor profile can be chosen and loaded on the graphic card.
Conclusion
Those who put value on a long term to a colour true representation of their monitor and/or want to work in a permanently professional colour management process will only achieve this by a regular screen calibration. For this purpose, the Datacolor SpyderXPro is a highly recommendable hardware tool that is simple and easy to use. And for a fair price considering that with it, one has real and true screen colours over years.
Back to the index software tests
|