Test report of the Canon scanner CanoScan 9000F
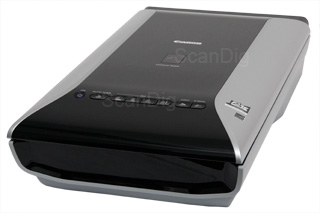
With the introduction of the CanoScan 9000F in June 2010, Canon brought the successor of the very popular Canon CanoScan 8800F into the market. Except the higher resolution of 9600x9600 ppi (instead of 4800x9600 ppi in case of the 8800F), not many things have changed: the warm-up period of the scanner is even shorter and the case has been pepped up a little.
Otherwise, the technical data of the new flat bed scanner of Canon do not differ from those of the previous model which prooved to provide a good image result for this sort of scanner and price category, as you can read in our detailed test report. In the following chapters we would like to show you whether the 9000F also achieves this image quality or if it even exceeds it. Thereby, we of course lay special emphasis on the achievable quality in the case of the scans of the film material even though the CanoScan is mainly designed, as all the other flat bed scanners, for the scanning of non-transparent documents as paper fotos or documents. Moreover, we will also get into the eqipment, the provided software and the usability of the scanner.
The Canon CanoScan 9000F has been replaced by its successor Canon CanoScan 9000F Mark 2 in April 2013.
Equipment, accessoires and performance data of the scanner
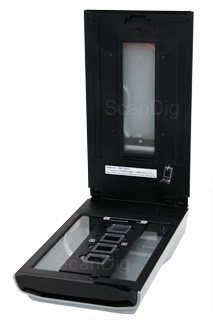
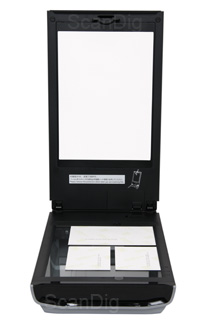
As it was also the case of the previous model, the Canon CanoScan 9000F offers a scanning surface of A4/letter-size (31,6 x 29,7 cm) for non-transparent patterns. But for the scanning of transparent material, there is only a relatively small strip of a width of 8,2 cm available that is determined by the position and the size of the integrated transparency unit in the lid which is located in the centre and almost runs throughout the length of the scanning surface. Thus, with the newest scanner of Canon, it is also possible to scan those film formats larger than the 120/220 medium format.
Respectively, the CanoScan 9000F is delivered with the following film adapters: A film adapter for up to four framed 35-mm slides, one film adapter for two film strips of 35-mm each up to a length of 6 images and one for medium format film strips of a length up to 22 cm. Therewith, it can capture up to four images of the format 6x4,5 cm, or up to 2 images of the format 6x6 cm or up to 2-3 images of the format 6x7 cm (depending on the width of the picture bar). The film adapters do not differ from the ones of the CanoScan 8800F and are positioned straight on the glass plate, whereby they are fixed at the top and the bottom with some positioning aids in the correct position.
According to the producer´s announcement, the maximal optical resolution of the CanoScan 9000F is of 9600x9600 ppi - a value which, if achieved, would only make sense in the case of high resolution film material. But as the effectively achievable resolution of the scanners of this category is always clearly below the optical resolution announced by the producer, one should not expect any wonders here too. Further on this page, in our chapter image quality , we will clarify the actual level of the resolution.
The FARE-level-3 technology has also been taken over from the previous model. This technology enables the scan software to recognize dust and scratches by means of an infrared-ray, thus hardware-based, and to correct it automatically. It is Canon´s equivalent to the ICE- and/or iSRD-technique. For more information about the harware-based dust and scratch correction, please visit our website about dust and scratch correction procedures.
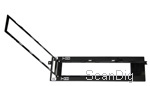
The lid of the scanner can be folded upwards by 90° in order to position the patterns on the scan surface. If one folds the lid upwards by 45°, it snaps in so that one does not have to fully open it in order to feed the scanner. This is specially pleasant in case the device stands in a place which does not offer enough space to open it completely. For the scanning of thick patterns, the lid can also be lifted by 2,5 cm parallel to the base. But contrary to the previous model, it is unfortunately not possible to remove the lid completely in order to place some bulky patterns as for example thick books - a circumstance that is due to one design element: The transparency unit that is located in the lid is not controlled anymore by a cable running outside the device but is straight connected to the scanner by some invisible cables running through the hinges.
There is a blend at the inner side of the lid that has to be removed for the scanning of film material in order to expose the transparency unit. In case of scanning non-transparent material, the blend provides a white background for the patterns. At the upper side of the lid in the front region there are, beside the power-button, seven further buttons over which the frequently needed scanner functions can be activated by simply pressing them: Four buttons serve for the automatic generation of PDF-files (colour, grey scale, defined by the user and finish), and the other three buttons are assigned by standard to the functions copy, scan/ edit and send e-mail. But these three buttons can be also assigned to other functions over the scanner software. Thus, in this concern, there is also no innovation compared to the CanoScan 8800F.
The software equipment is, typically for Canon, complete: Everything what is needed for the scanning and the posterior image processing is included in the scope of delivery. In the chapter software, we inform you about which programs these are. Unfortunately, the thick manual which is included in the scope of delivery of the CanoScan 9000F is not a detailed handling instruction but only a short instruction but available in 19 languages. A detailed manual is only available as the so-called online-manual which has to be read and/or consulted on the computer screen. Through a very practical search function it is possible to find some special topics easily.
The connection to the computer takes place over a fast USB 2.0 interface. The power supply does not take place anymore over an external power adaptor but an internal which is connected to the power with a simple power cable that is included in the scope of delivery.
Installation and start up
As it is the case in most of the USB-devices, also in the case of the Canon CanoScan 9000F, first the software has to be installed before the device is actually connected to the computer. Thereby, one can choose between a simple (automatic) installation of all components and a customized installation in which oneself can choose the components to be installed. This is accomplished without any problem by just following the instructions on the screen.
Before connecting and starting the scanner, one has to unfasten the transport interlock without any fail, as otherwise one risks to damage the device irreparably. But the device is labelled with some clear warnings so that one practically cannot forget to accomplish this step. For the unfastening, only a slide switch located at the upper side of the scanning surface has to be moved. Thereafter, the CanoScan can be connected to the computer and the power supply and be started. The new hardware is recognized and one can start with the scanning.
Scanning non-transparent patterns with the Canon CanoScan 9000F
The scanning of non-transparent material is the main function of a flat bed scanner as the Canon CanoScan 9000F. There are no surprises in this concern. Therefore, one starts the TWAIN-driver, either over the Canon-Software MP Navigator EX or over the import-command of an image processing software as for example Photoshop® Elements or Photoshop® CS. Another possibility is to assign this function to one of the three scanner buttons that can be customized.
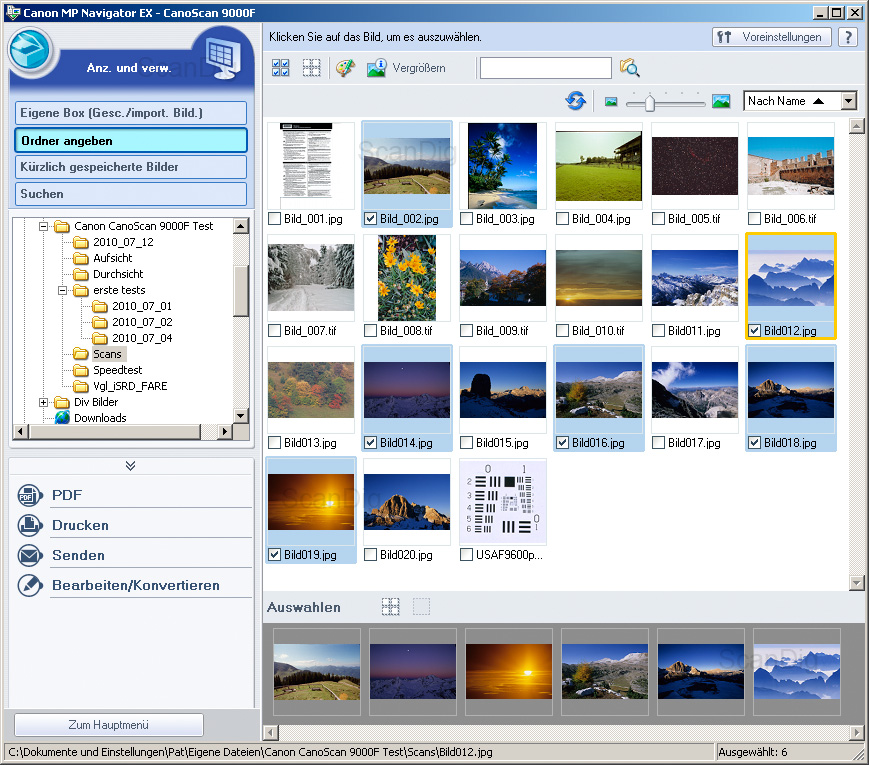
By starting the MP Navigator EX software, one first only sees a small window in which several scanning functions can be activated over some buttons. Above each of these buttons there is a placeholder in which one of the three symbols can be placed for the scanning buttons. By this way, it is possible to assign the functions of these buttons by a simple drag&drop-action.
By clicking now on the save-button, a window appears in which it is possible to determine the saving place and the saving format and also decide if the image adjustments made are valid or if the TWAIN-driver should be started. This driver offers three different operation modes to the user to choose: The basic mode, the advanced mode and the automatic scan mode.
The scanning takes place in the already known way to proceed: Accomplish a pre-scan, set the adjustments and start the fine scan. Thus, one places the patterns to be scanned on the scanning surface, sets the type of pattern and accomplishes a pre-scan. Now, one raises one or more scanning frames in order to determine which image area(s) should be scanned. Alternatively, it is also possible to leave the automatic frame recognition to the software. If one scans with the advanced modus, it is also possible to adapt the adjustsments for the scanning according to one´s ideas. Thereafter, one clicks on the scanning-button with which the fine scan is accomplished. To the contrary, the basic mode barely offers some adjustment options. By this way, for example, the possibility of setting the resolution is not available. Instead, it is possible to adjust what the "target" of the scan is supposed to be, so that the resolution is automatically set accordingly. For example, if one sets print as a target, the non-transparent patterns are digitalised with a resolution of 300 ppi.
What works very well is the automatic image recognition of the scan software of Canon. It can recognize several images on the surface, cut them automatically and save them as individual image files. Therewith, it is not a problem to digitalise a whole collection of paper images of different sizes, as one simply places as much images as it is possible in the scanner, makes a pre-scan, activates the display mode for thumbnails, and one already sees all placed patterns as individual and already trimmed images. The automatic scan mode uses this function but without offering any adjustment options - even the type of pattern is automatically recognized and scanned with determined pre-adjustments.
Thus, in total it can be said that the scanning of paper images or other documents with the Canon CanoScan 9000F is a very pleasant and fast matter. In this concern, the scanner plays well on its strengths.
Scanning framed slides with the Canon CanoScan 9000F
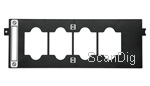
In order to scan transpartent film material with the CanoScan 9000F, first, one has to remove the blend from the inner side of the lid. Then, one puts the film adapter which can take up to four framed 35-mm slides on the scanning surface in a way that the positioning aids align the film adapter correctly. Actually, film adapter is the wrong word: It is rather a template which determines the position of each slide over the respective sections. Thus, the slides are put face-down straight on the glass surface after the template. In order to make the removing of the material easier, there are some semicircular convexities for the fingers at the left and the right side.
Due to its structure, the slide adapter can take frames of any thickness. But it also causes some important disadvantages. By removing it from the scanner, one inevitably dirts the scanning surface in case one does not use any cotton gloves, and one can only load the slide adapter inside the scanner, a thing that can make the work very uncomfortable.
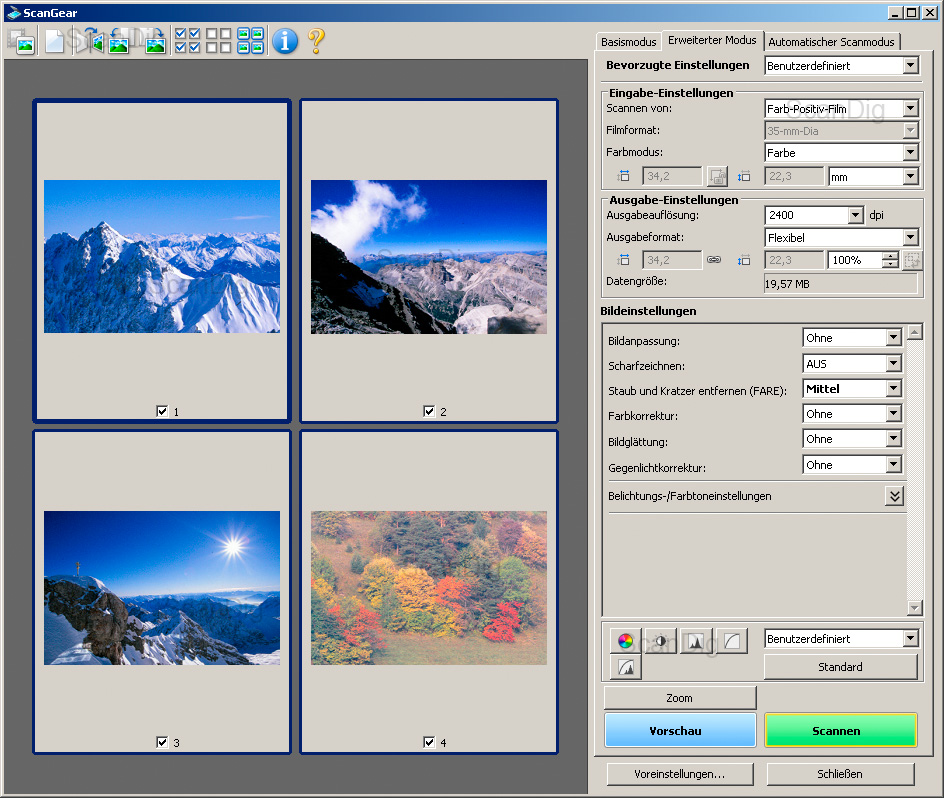
In the advanced mode, one can choose between two different pre-scan views: One can display the pre-view either as thumbnails of each of the slides or in the traditional way representing the whole transparent surface. In the case of the framed slides there is no reason for not making use of the thumbnails, as the image details can be recognized without any problem by the fixed position of the slides.
During the scanning with thumbnails, the scanning adjustments can be determined either for each slide individually or by selection for several and/or all slides at once. By setting some checkmarks it is also possible to determine which of the displayed slides should (not) be scanned. If one accomplishes the scan with the pre-view of the whole scan surface, one has to set a frame around each slide to be scanned. Thereby, each new frame takes over automatically the adjustments of the last active frame. But it is also possible to adapt the adjustments for each frame individually.
The processing of film material with a flat bed scanner is always more labourious than it is with a real film scanner. But in case of the CanonScan, the small scanning surface for transparent materials make this specially difficult. As it is only possible to load four slides at once, in case of digitalising some larger amounts, one is practically only busy with changing the patterns. Due to the construction of the film adapter as a template, it is also not possible to load another film adapter while the other is in the scanner. Thus, one has to place the slides, scan, remove them and only then it is possible to reload the film adapter.
Thus, the scanning of framed slides with the Canon CanoScan 9000F is rather a laborious matter. During the work one realizes that the scanner is not made for this purpose but that the slide scan function is rather an added feature in order to digitalise some slides occasionally.
Scanning 35-mm film strips with the CanoScan 9000F
The adapter for 35-mm film strips included in the scope of delivery of the CanoScan 9000F can capture two film strips with each up to six images. Thus, it is possible to scan up to twelve images per process. Of course it is also possible to load the film adapter with several shorter film strips or with single negatives.
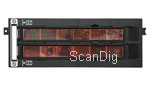
But in this case, the insertion results to be tricky: The locking mechanisms of the film adapter can certainly be opened and closed for each film strip independently from the other, but once the film adapter is opened it does not offer any stability, so that several short film strips are unavoidably moved by closing the lid. Only at the very end where the hinges and the cover flaps are located, there are two small guiding pins which barely offer any support. The matter gets specially laborious if the film strips are curved or waved - then, at least three hands would be needed for fixing the material up to closing the lid. Thus, the insertion of single film pieces or curved film strips is a very tricky matter.
The automatic division into single images also works perfectly in the case of film strips. Even several short film strips are normally recognized and divided. Only in the case of very dark motifs, the automatic does not work anymore, as in this case, the image bar is not distinguishable from the pratically unexposed image area. But in the case of normally exposed images, one can confidently also make use of the thunbnails during the pre-scan as here, the empty areas of the pre-scan are also recognized so that no white surfaces are shown as images.
Also the special formats such as the half format or a panorama format can be scanned. The only thing one needs to do for this is to adapt manually the scanning frame in the pre-view of the complete transparency area.
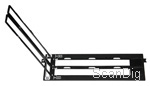
Contrary to the scanning of framed slides, the scanning of film strips works better insofar that the film strip adapter can be loaded outside the scanner. By buying a second film strip holder, it is possible to load it calmly with film strips or single images, while the other film strip holder is in the scanner. But the only way to load the film adapters in a safe and comfortable way is by wearing some cotton gloves or using some special tweezers for holding the film strips.
Scanning medium formats with the Canon CanoScan 9000F
The film adapter for medium formats of the CanoScan 9000F can capture a film strip of a length up to 22cm. Respectively, it is possible to insert four images of the format 4,5x6, three images of the format 6x6, two of the formats 6x7 (three images in case of very thin picture bars), 6x8 and 6x9 or one in the panorama format. Also the panorama images sized 6x17 can be processed with this device. Therewith, the Canon CanoScan 9000F offers some very good conditions for digitalising medium formats. But if the achievable image quality is worthy of a medium format is another question.
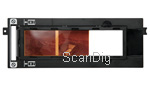
Also in the case of the film adapter for medium formats there are the same problems as with the film adapter for 35-mm images to struggle with: The flat film strips in one piece can be inserted without any problem, but again, in case of single images or curved film strips, it turns to be tricky again. Also here, except the two small guiding pins, there is no support provided to the film, so that the patterns move when the lid is closed.
A spare part of the film adapter for medium formats of the CanoScan 9000F is a black small card of the same width as the film material which, while scanning some shorter film strips and in case of curved film material, they can be put underneath the edge of the material that is too short to touch the other side of the film adapter so that dazzles can be removed and the strong curves reduced.
Also in the case of medium format materials, the automatic image division works without any problem. If a film format is adjusted with the automatic recognition, one does not even have to pre-select the format - this worked perfectly during our tests with normal exposed images. As the scanning frames can of course also be manually determined for scanning medium formats, it is also possible to scan special formats as for example the 6x17 cm panorama-format - up to maximum 6x22 cm, limited by the length of the film adapter.
In total, it can be said that the scanning of frameless medium format films with the Canon CanoScan 9000F works very well. During the handling of the film material, one should not miss to wear some cotton gloves or use some special tweezers for holding the medium formats. The film adapter for the medium formats can be loaded outside the scanner. By buying a second film adapter for medium formats, one can calmly load it with the film material while the other is in the scanner and the films inside it are scanned.
The software provided with the Canon CanoScan 9000F
As it was already the case of the previous modell, also in the case of the CanoScan 9000, the MP Navigator EX takes over the role of the all-round-software solution for the scanner. Since the CanoScan 8800F, the MP Navigator EX replaces the old CanoScan Toolbox.
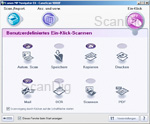
By starting the software, one first only sees a small window with 8 buttons over which some different scanner functions can be accomplished straight away just per one mouse-click.
By clicking here on save, the dialogue box opens in which one can determine, amongst other things, the saving place for the scans. By activating here the option use scanner-driver, after clicking on the scan-buttonn the TWAIN-driver named ScanGear is started. By deactivating this option, it is already possible to determine certain adjustments previously such as the colour mode and the resolution, and, after clicking on the scan-button, the patterns are straight scanned with these adjustments. Herein, it is also possible to make use of the full functionality of the scanner that results by the use of the ScanGear.
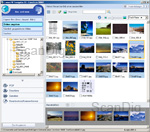
By choosing the option Open with: Open without (dialogue window "display and use") in this dialogue box in the area Application Settings, after the scan, a part of the MP Navigator EX opens that is really worthy of its name: It results to be a complete image viewer and image administration program. The content of the current file is shown as a thumbnail. After a double click on an image, it opens in a new window in which some file information such as the name, creation date and image size is displayed at the bottom. With the assistance of the buttons arranged at the left windows, the marked images can be sent to different applications. By this way it is possible, for example, to create a PDF-file of several pages from the just scanned documents just by clicking one button. With the help of the directory tree it is possible to navigate through all storage media, and of course it is possible to use the functions of the MP Navigator EX not only for the scans but also for all image files.
This part of the program can be also opened independently from the scanning procedure. Therefore, one has to click a small and inconspicuous button located at the lower left corner in order to change to the navigation mode. If one chooses here the option Display and Use, the navigation window opens.
In general, everything remained the same in the TWAIN-software ScanGear. The three scan modes got new names but only offer slightly moderated functions:
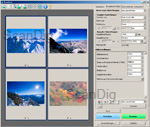
In the basic mode (former Simple Mode) only very few things can be adjusted by oneself. One can choose between different pattern types as for example foto, newspaper or positive/negative-film, choose between three different outputs as for example print (they only determine the resolution) and can activate or deactivate certain automatic corrections. Only in the advanced mode - the name is still the same - one has the full control of all functions. It offers the access to all available image correction processes as for example the dust and scratch reduction, sharpening, image smoothing and enables the free scaling of the scan. Also the professional adjustment possibilities as the gradiation curves and tonal value correction are available.
The automatic scan mode that replaces the former multiScan mode is designed for the full automatic scanning of several patterns no matter of which type. In this mode, the software recognizes automatically which type of pattern is in the scanner and scans it automatically. The only exceptions are black-and-white films and medium format films; in order to scan these correctly, one has to choose the basic mode or the advanced mode. The user cannot accomplish any adjustments in the automatic scan mode - even the scan resolution is pre-determined by the program. One only has to insert the patterns and click afterwards on scanning - that´s it. During our tests, the automatic mode was almost always reliable.
Those who want to scan in a comfortable way should choose the in-house scan software of Canon. But those who prefer a good image quality rather than comfortability should scan with the scan software SilverFast SE. Without any manual correction, this software provides indeed images that, compared to the results of ScanGear, appear to be a little weak and colourless, but they are definitely the better base for the optimization of the scans. For the unexperienced user, ScanGear provides at first sight some images which look nicer and more colourful, but the tonal values are trimmed in a stronger way so that it is not possible anymore to take much out of them.
Contrary to the previos model, SilverFast works now also with the infrared technique of CanoScan 9000F in co-operation, this means that finally it is also possible to use with SilverFast the hardware-based dust and scratch correction in conjunction with the Canon flat bed scanner. In the chapter Image Quality we will see if the iSRD technique(LaserSoft Imagings pendant to ICE and FARE) works here as well as with the Canon software.
Beside the scan software, there is also the image processing program ArcSoft PhotoStudio 6 included in the scope of delivery of the CanoScan 9000F. This program offers some rudimentary image processing functions in a slightly larger extent than offered by Microsoft´s Paint.
The Canon CanoScan 8800F is optionally available with the professional scan software SilverFast Ai (not to be mistaken with the reduced version SilverFast SE). SilverFast Ai gets more out of the scanner than the scan programs of the producers. Those who already know SilverFast from other scanners will immediately be able to handle the software and can start to scan immediately after the installation. In our Information-page about SilverFast there is more information about SilverFast and its different versions available.
The image quality of the CanoScan 9000F
In this chapter, we will show you the achievable image quality with the Canon CanoScan 9000F. The manufacturer´s data are very promising as usual but also in case of the newest model of Canon one should not expect any wonders. As a flat bed scanner, this device is, as also its colleages, mainly designed for scanning non-transparent documents. But of course, we are also highly interested how successfully the CanoScan performs in case of transparency scans of film material.
But first the non-transparency scans: By scanning paper fotos and other non-transparent materials, the performance of the CanoScan 9000F is excellent. Such documents are digitalised in shortest times and in a good quality. The range of density and the resolution are high enough; for non-transparent documents, a resolution of 300 ppi is normally enough. A higher resolution makes sense only in exceptional cases, as for example in the case of high-quality analog images.
But in case of digitalising film material, the matter changes completetly: Herein, the maximum achievable resolution can be a decisive factor. In order to enlarge a 35-mm slide without any loss of details to an output size of 20x30 cm with a resolution of 300ppi, it should be scanned with at least 2500ppi.
This is why we of course test the resolution of the new CanoScan with the USAF-test chart. The horizontal lines of the element 5.1 and the vertical lines of the element 5.2 can be barely distinguished, so that in accordance to our resolution table we achieve a resolution of approximately 1700 ppi. This corresponds to approximately 17% of the nominal value of 9600 ppi. Thus, compared to the previous model, there is a slight increase: The CanoScan 8800F could make 1600 ppi. Nevertheless, the achieved resolution value is still much too low in order to print out the scans of 35-mm film material without any big loss of quality in larger formats than 13x18 cm. Good film scanners provide resolution values up to 3900 ppi (Nikon Super CoolScan 5000) or even 6200 ppi (Hasselblad Flextight), even some film scanners of a lower price category partly achieve some values exceeding 3000 ppi.
A scan with 1700 ppi provides an image file with approximately 4 megapixels; today, such a value is outperfomed by the most simple digital cameras. In order to achieve an effective value of 1700 ppi, the pattern should be scanned with 4800 ppi. The scan of a 35-mm negative or a 35-mm slide with 4800 ppi provides an image file with 32 megapixels. But from these 32 million pixels only 4 million is actually real information contained in the scan; the remaining pixels are double and multiple. Thus, in case of scanning film material, the Canon CanoScan 9000F provides some extremely inflated image files which have to be reduced to a rational size after the scanning in a very laborious image processing.
We have measured the resolution either with 4800 dpi as also with the maximum resolution of 9600 dpi; in both cases, the resulting values is effectively about 1700 ppi. The increase of the resolution in comparison to the previous model seems to be only for marketing reasons, as in practice we have not noticed it. But by adjusting a lower resolution than 4800 ppi, then the measured resolution reduces to some values which are far below the 1700 ppi.
Concerning the range of density, nothing has changed, as the CanoScan 9000F provides some similar results as the previous model 8800F. But fortunately, by processing non-transparent patterns, the FARE-technology performs a very good service and recognizes the major part of the dust and scratches on the pattern. This is particularly worth mentioning, as until now, the hardware-based correction process worked less than good in case of non-transparent patterns. The hit ratio is of approximately 90%. The same goes for the scanning of film material. But herein, the procedures of other producers work better and correct almost 100% of these interferences. On our information page about the different dust and scratch corrections there is more information available about this topic.
A significant increase in the image quality can be achieved by the use of the software SilverFast Ai-Version. This version enables the IT-8 calibration so that one can measure and profile the own scanner individually. The IT-8 calibration is noticeable in more true and natural colours; one saves a lot of work in the image processing after the scanning if the colours are straight correctly recognized and saved by the scanner.

Click on the sample image shown here in order to see a comparison between the scan of a slide with and without calibration; thereby, the image changes approximately any two seconds between the calibrated and the uncalibrated scan.
Due to the calibration, we were also able to achieve more homogeneous details in our test device. The calibrated scan shows clearer gradiations in the dark tonal value areas, while they are barely distinguishable in the uncalibrated scan. Thus, those who attach importance to the image quality should not miss to scan with SilverFast Ai. This software is also available as an Ai Studio version with some additional features as Multi-Exposure or as a version with a printer profiling function. The Multi-Exposure function of the studio-version increases the range of density of the scanner from 3,14 to 3,95 (measurements results of LaserSoft Imaging), so that one can count with a drastic increase of the image quality in case of slide scans. On our page about SilverFast there is some detailed information about the SilverFast scan-software.
One might wonder of course if it is legitime to pay the same price for the scan software as for the scanner itself. But it is definitely so if one attaches importance to a high image quality. SilverFast Ai does not only increase the image quality by the IT-8 calibration but also by some better image processing algorithms and professional adjusment options.
In total it can be said that the image quality of the Canon CanoScan 9000F is acceptable for occasional scannings by using it with the SilverFast Ai scan-software and an accomplished IT-8 calibration for the scanning of slides and negatives. But for the permanent archiving of film material, the image quality is not suffieicent only because of the much too low resolution. Those who digitalise their high-quality medium format images with the Canon CanoScan 9000F will get some image files of a quality that is lower than the scans of 35-mm films done by simple film scanners. Thus, the big advantage of the medium format that once labelled a professional photographer gets lost.
The scan speed of the Canon CanoScan 9000F
With the Canon CanoScan 9000F it is possible to scan non-transparent patterns in a very fast way. The pre-scan takes only approximately 3 seconds and a A4-format pattern with 300ppi without dust and scratch corrector is scanned within 8 seconds. The values are identical with the scanning times achieved with the previous model.
But in case of transparent patterns, the scanning times we have detected partly differ significantly from the ones of the previous model: They are considerably shorter. A certain (small) contribution to that is also the circumstance that we have used a faster computer than we did during the test of the CanoScan 8800F. But this circumstance cannot be the only element responsible for such a clearly higher speed - therefore, the differences are already much too large only in case of the scans without the CPU-intensive FARE.
By this way, for the scan of a 35-mm slide with 4800ppi without FARE, the CanoScan 9000F only needs 53 seconds, while the previous model needed 2 minutes and 37 seconds. By adding the FARE-function to that, the difference is as clear: Only 2 minutes and 50 seconds of the 9000F against 4 ninutes and 36 seconds of the 8800F.
| Procedure |
without FARE |
with FARE |
| Pre-scan |
0:03 min |
0:03 min |
| 35-mm positive-scan with 2400 ppi |
0:30 min |
1:08 min |
| 35-mm positive-scan with 4800 ppi |
0:53 min |
2:50 min |
| 35-mm positive-scan with 9600 ppi |
1:38 min |
6:28 min |
| 35-mm negative-scan with 2400 ppi |
0:53 min |
1:51 min |
| 35-mm negative-scan with 4800 ppi |
1:43 min |
4:23 min |
| 35-mm negative-scan with 9600 ppi |
2:20 min |
7:17 min |
| Medium format 6x7 positive-scan with 2400 ppi |
0:53 min |
2:35 min |
| Medium format 6x7 negative-scan with 2400 ppi |
1:14 min |
3:15 min |
| Medium format 6x7 positive-scan with 9600 ppi |
4:00 min |
29:00 min |
| Medium format 6x7 negative-scan with 2400 ppi |
4:10 min |
20:20 min |
The times listed on the table were detected with our test device that was connected via USB 2.0 cable to a computer with 2,5 GHz Core-2-Duo-processor and 4 GB memory. Thus, concerning the speed, the performance of the CanoScan 9000F has significantly increased. With this device, the larger amounts can be digitalised in considerably less time as it was the case with the previous modell. By this way, the frequent change of patterns forced by the tiny transparency surface can be compensated to a certain extent.
Resume, conclusion
The Canon CanoScan 9000F can and will not replace a good film scanner. It is rather a good allround-device that offers a pleasantly good image quality in this price and quality range. The CanoScan plays its strenghts specially in the area of the non-transparency scans - these can be quickly accomplished in a good quality.
But this scanner is also apt for the occasional scanning of transparent materials. Specially in conjunction with the optionally available SilverFast Ai Studio software, the device offers case of film scans an image quality that is sufficient for those home users without too high requirements for many applications. But those who want to scan large amounts of film material and/or have high requirements concerning the image quality, will unavoidly have to purchase a good film scanner. As with such requirements, one will in any case not be satisfied with the CanoScan 9000F.
Back to the film scanner tests index
|
)
)
)
)
)
)
)
)