Epson Perfection V800 Photo test report
In November 2014, Epson introduced the Epson Perfection V800 Photo, successor to the Epson Perfection V700 Photo, which has been on the market since eight years. Finally, after having waited a vast amount of time, the scanning folks welcome the introduction of the succesor to the well-tried Perfection V700 Photo.
If after 8 years, a V700 evolves into a V800, then this sounds like a huge leap, like a new generation of scanner, featuring higher resolution, better color fidelity, faster scanning speeds etc. When placing the two devices next to each other, however, it's obvious at first glance that - besides the new lettering - not a dreg has changed. Upon comparing the data sheets of the two devices, just one small change attracts attention: the new Epson Perfection V800 Photo powers up quicker. The warmup time amounts to less than one second. Our test report shall review whether further, hidden changes have been made and whether the image quality has been enhanced.
The Epson Perfection V800 Photo is not available any more since 2021. Epson only continues selling the Perfection V850 Pro.
Features, accessories and performance evaluation
The Epson Perfection V800 Photo features a USB 2.0 connection, as is standard with film- and flatbedscanners. The respective connecting cable and the power supply are included in the box. The maximum dimension for scanning transmitted light of 203 x 254 mm remain unaltered compared to the predecessor and are top. Bigger transparency units are only featured by A3 scanners such as the Epson Expression 12000XL Pro. The transparency unit of the V800 is included in the lid of the scanner and hence does not need to be sperately mounted. If you look closely, the technical differences between the Perfection V700 Photo and the newer Perfection V800 Photo can be spotted: while the old model featured a white cold cathode tube light, the newer V800 makes use of a white LED. With the LED being operational right away, the operator saves some seconds after switching on the scanner. Image quality is not affected by the new light source.
According to the data sheet, the new Epson Perfection V800 Photo differs only marginally from the predecessor Epson Perfection V700: the shorter warm-up time is beneficial for users seeking to do some quick single scans. The average user though will use the longer warm-up time to arrange various tools and start up programs and thus won't notice the time differnece much, especially as it only arises before the very first scan. From the second scan on, there is no waiting times with either device.
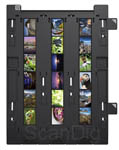
For transmission scans, the Epson Perfection V800 Photo makes use of the hardware based dust- and scratch correction method ICE. Four film holders are part of the delivery scope: one each for 35mm film strips and slides, one for medium format strips and one for 4x5 inch large formats. We will further enlarge upon these in the next chapter. Whether this scanner does in fact reach the proclaimed optical resolution of 6400 dpi or, as its predecessor, falls short by more than 60%, will be revealed in the chapter image quality. The density is declared as 4.0 DMax. This value is unsurprising and in comparison with other film scanners, rather low.
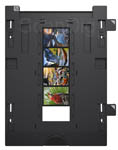
The new film holders of the Epson Perfection V800 Photo
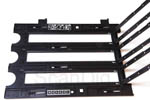
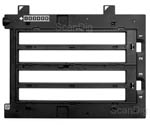
We noticed one prominent difference to the predecessor model right away: the film holders have been altered. All film holders are now adjustable in height. Besides the slide holder, all holders now feature glass covers. When closely examining the glass of the film holders, comparing it to let's say, the glass panel in the scanner, the opaque structure of the film holders becomes apparent, which leads us to the conclusion that it might be anti-newton coated. It's astonishing that this is distinctive variation has not been noted anywhere in the official data sheets from Epson, whilst some benign feature like the shortened warmup time is being emphasized and underlined. Supposedly, many inexperienced would-be buyers will be more impressed with a speed improvement of any kind than with special film holders.

The new 35mm film strip holder now holds a mere three film strips, as opposed to the four of the preceding model. Hence, only 18 images can be scanned in batch mode instead of 24. The new medium format roll film holder holds only one 120/220 film strip as opposed to two. Finally, with the new large format holder, only one 4x5" can be handled at once, instead of two. The large transparency unit of the Epson Perfection V800 Photo is thus not being efficiently used.
The new film holders of the Epson Perfection V800 Photo are adjustable in size, and the film hoders for film strips, medium formats and large formats feature glass covers. Yet, the latter hold fewer film strips than the respective preceding models.
The height adjustability of the new film holders offsets one flaw of the Epson Perfection V800 Photo: the scanner has only fix focus, i.e. the focal plane can not be manually adjusted. Through the height adjustment on the film holder, the distance between the sensor array and the film can be varied and thus, the focus can be influenced. The bigger Epson Expression 12000XL features auto focus, meaning the scan-sensor can adjust to the film material.
With help of small slide controls, the hight of the holder can be adjusted. The 35mm-, the medium format- and the large format holder each feature six such slide controls. Each slide control can be adjusted in five increments. The difference in height between the highest and the lowest increment amounts to circa 2 millimeters, meaning about 0.5 millimeters per increment. A triangle or rather arrow marks the ideal setting that is to be used for proper focus in the normal case. All other settings are marked with rectangles. All slide controls of the filmholder have to be adjusted to the same setting, otherwise the holder will not rest evenly, leading to undesirable blur or worse, distortion.
The Epson Perfection V800 Photo has fix focus. With aid of the height regulators on the film holders, the focus panel can be manually adjusted.
The new film holders for 35mm small format film strips, medium format film strips and large format now feature glass covers in series. Why Epson incorporates the glass covers in quantity is beyond us. In the entire business, it's standard to always use as few glass layers as possible, because the scan quality is always negatively influenced by these. Numerous image errors can arise, such as Newton's rings or color aberrations of various kinds. Film scanners are distinguished by the fact that they ray film material only, whithout glass layers. Flatbed scanners always have two glass panels between light source and ccd-sensor (besides the Microtek ArtixScan F2). But now Epson added two more glass panels in the film holders. The effect this has on scan quality is illustrated in the following sample images.
The glass covers of the new film holders make sense only in the case of severely curved or corrugated film material as they will prevent blur by flattening such material. In order to benefit from this construction, the film material needs to be severely arched or corrugated. Film strips with a normal curvature hardly touch the glass. Our test images were resting about 0.4 mm underneath the glass panel, so we did not benefit in any way.

On the basis of the following examples, we illustrate the negative impact the additional glass layers can pose. In the first picture, you can check out a scan with the following parameters: automatic dust- and scratch correction and multiple exposure (a setting that is quite usual for obtaining ideal results). Upon clicking on the alongside picture, an animation will open up, showcasing the difference between the scan obtained using a new film holder and an old one. It's clearly obvious that the multi-exposure function works better with less glass layers, ie. the old holders.
What's more, we noticed a considerable increase in dust particles being missed by the automatic dust- and scratch correction. This additional pollution is obvious even when looking at the zoomed out version of the scan. Even though both the glass covers and the negative had been cleaned using an anti-static brush beforehand scanning, these dust particles remain in the final scan. They are especially disturbing in the homogeneous color field of the sky.
Whilst the insufficient dust- and scratch correction can still be fixed by an efforful post production, the image artifacts portrayed in the next chapter will prove much harder to redeem. Of the adjoining 35mm slide scan, we have taken four sections which we will now examine more closely. They are marked red and numbered in the image. Each picture is clickeable; the pop-ups will then show scans obtained with the old and new film holders, in alternation. Each window shows an extract of the picture at 100% zoom level.


Image section 1 shows that it can very well happen for the automatic dust- and scratch correction to deliver faulty results due to the glass layer, making the correction very obvious in the end result. In the scan without glass layer, even this big particle could be removed without residues.
Image section 2 shows a striking problem: color fringe. If looking closely at the edge of the church roof, you will notice a cyan-colored fringe. But also the beak of the roof and on the windows show color fringes, here of red color, which clearly should not be part of the picture.


Image section 3 shows a blown up version of the terrace and the yellow sunshade. In the scan obtained using the new film holder, this sunshade is not entirely yellow, but shows both a red (on top) and a cyan (below) color fringe. The shade on the house wall in picture four shows the same characteristic.
The artifacts shown in image sections 2,3 and 4 are so called chromatic abberations. Chromatic abberation (also called achromatism, chromatic distortion or spherochromatism) is the term for a type of distortion in which a failure of lens to focus all colors to the same convergence point (which is due to the difference in light refraction between light of different wave length). As such, short-wave blue light will always be bent more than long-wave red light (as can be seen using a glass prisma). Therefrom, the glass covers of the film holder additively bend the light rays during the scanning process, causing the unpleasant color fringes.
Wherever there is glass deployed, defects in color - such as chromatic abberation - are found. This concerns all of optics, microscopes as well as telescopes, camera lenses and, of course, glass plates built into scanners. Such color defects cannot be avoided; they can only be minimized by the use of premium glass.
The glass covers of the new film holders cause a decline in image quality. As long as the glassless film holders of the predecessor model are still available, we strongly advise to use these in favour of the new ones. The film holders with glass cover make sense only for corrugated film material.
Concluding, it shall be noted that defects as portrayed above are not a caused by flaws of the device nor the film holders. Instead, the film holders have a special feature, namely glass covers, that are causing these defects. This all is physically unavoidable. In order to avoid such adverse effects, either the glassless film holders should be used, or the films have to be placed directly on the scanner glass.
Installation and start-up
The Epson Perfection V800 Photo takes quite some space on the desktop. It's dimensions of 503 x 308 x 152 millimeters might make it necessary to clear some extra space. With the transparency unit integrated into the lid, the document mat needs to be inserted before performing reflective scans. Next, the transport locks need to be unlocked, of which the Epson Perfection V800 Photo has two. One is located on the back end of the scanner, right next to the power supply, the other on the lower left area of the scanner. The respective connection jack is located next to the USW jack. After, the scanner can be connected to the power grid.
Before the scanner can be connected to the PC, the software needs to be installed. If SilverFast is going to be used, there is no need to install EpsonScan. However, it's no problem to install both programs. If EpsonScan is installed, the user will be asked to connect the Scanner at some point, close to the completion of installation. In general and especially after the initial installation, the user should check for software updates. This can be done either through the software or through the producer's website. Once the software installation of SilverFast is completed, the computer has to be restarted. After, the scanner can be connected to the PC. This connection ought to be directly through USB 2.0, making sure that the port used on the PC is a direct port. Also, external USB and extension cords hubs should be avoided, as this can lead to communication errors between the scanner and the PC. Finally, the scanner can be powered up.
Digizing mounted 35mm slides and film strips with the Epson Perfection V800 Photo
For scanning framed 35mm slides, a film holder with room for 12 slides is included with the Epson Perfection V800. The slides are place into the holder with the emulsion side facing upwards. For extracting the slied after scanning, two notches make room for gripping the slides with forefinger and thumb. Since the film holder can be used for both portrait and landscape orientation, the slides do not have to be consistently aligned. After placing the slides in the holder, they can be cleaned. For this purpose, a compressed air spray or a anti static brush should be used. The scanner glass should be checked for dirt, too. In case of pollution, it can be comfortably cleaned using an anti static cloth. In case of fingerprints, we advise the use application of some cleaning liquid.
The film holder is held in place with aid of two dents, in which it is being hooked into. These dents are marked by grey arrows, present on both the holder and the scanner. In case the white document mat has not yet been removed from the transparency unit, now is the time to do so. Beforehand closing the scanner lid and performing the first prescan, pay attention that all four slider bars of the filmholder are in the same position, ensuring that the holder will rest evenly on the scanner glass. For standard scanning,the height adjustment should be left in the standard position. Only if the slides are framed in very thick frames, can the height adjustment prove beneficial in terms of overall sharpness.
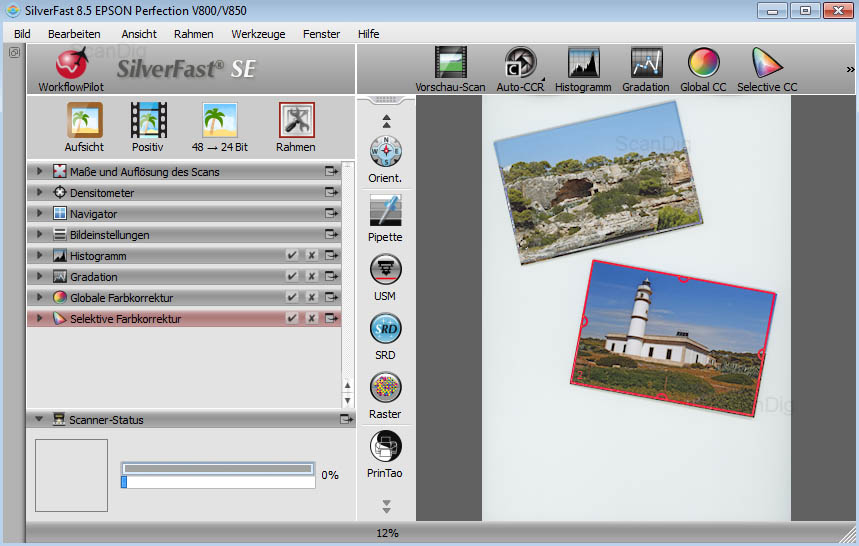
The actual scanning workflow depends on the software in use. Both in SilverFast and EpsonScan, a prescan ought to be made initially. We will elaborate on the differences of the two software variants and their use in the chapter "scan-software".
The use of a second slide holder is commendable: while one batch of slides is being scanned, the next one can be prepared. This saves quite some time, makes scanning more comfortable and effective.
The new slide holder of the Epson Perfection V800 Photo is adjustable in height. Compared to the preceeding model, it offers key advantages, ergo a definite advance.
Scanning of film strips works very similar, though the film holder supplied with the scanner has room for up to three film strips of six images each, making up for total of 18 images. As this model does not have any plastic seperators, panoramic images can be scanned, too. The film strip can measure of to 23 centimeters in total. As we mentioned in the chapter on film holders, this new type of film holder features a glass plate on the uppor side, which faces the transparency unit when inserted into the scanner. For loading film strips, the film holder can be placed upside down on the working surface and then be flipped open.
Its advisory to always clean the glass of the film holders beforehand equipping them with film material. For this purpose, kinetronics cleaning liquid, specially suitable for cleaning optical glass, in conjuction with a lint-free cloth is just the right tool. If you don't want to use cleaning liquid every time, an anti-static brush might be the tool of your choice for dust removal. These brushes are suitable as well for cleaning film material. Once the film strip has been inserted into the holder, the latter is being closed for which some pressure to the front and middle latches is needed. If necessary, the film material can now again cleaned just before insertion into the scanner. Pay attention to adjust all six hight regulators on the film holder to the same setting.
Talking efficiency, the same holds true for scanning film strips as for slides: A second film strip holder, increases overall scanning speed and reduces stress, as one holder can be comfortably filled whilst another is being processed.
Unlike the old film holder, sadly, the new film holder does not make use of the entire scanning area. What's more, the scanning results are worse due to the abovementionned image defects caused be the additional glass layer. Hence we recommend an alternative for scanning 35mm film strips: the optionally available film strip holder of the predecessor, V700. This model holds up to four film strips of six frames each, amounting to a total of 24 frames. That's six more frames per batch scan, all in better quality! The optimum configuration would be to have one type each. For standard purpose scanning, the old one should be used. When lacking sharpness due to curved material, the new one comes in handy.
For scanning of usual 35mm film strips we strongly recommend the use of the glassless film strip holder from the preceeding model, as long as it's still on the market. Not only will it yield better image quality, it also allows for batch scanning up to 24 images instead of 18.
Incidentally, we would like to point out that defects in color such as Newton's rings as painted in the chapter film holders are not a defect of the device. They are merely caused by natural, physical characteristics of light. We can only hope that Epson will keep on selling the glassless film holders of the predecessor model.
Scanning of medium formats and large formats with the Epson Perfection V800 Photo
The film holder for medium formats features a glass cover just like the small format film strip holder. This film holder has room for one film strip with a maximum length of 20 centimeters. Ergo, up to four 4,5x6cm, three 6x6cm, two 6x7cm, two 6x8cm, two 6x9cm or one panoramic medium format can be scanned at once. Framed medium formats need to either be unframed beforehand scanning, or placed directly onto the scanner glass. We advise the first option, as otherwise, a lack of overall sharpness could be caused due to the fact that the scanner is equipped with fix focus only (depending on the thickness of the slide's frame). The adjoining picture shows a prescan of a framed slide, placed directly onto the scanner glass. If you want to increase efficiency and image quality, you might consider using the glassless film holder of the Epson V700. It provides room for double as many pictures as the equivalent new version, making use of almost the entire scan area. The resulting time saving is highly cherishable, especially since high resolution medium format scans take a considerable amount of scanning time... check it in our chapter on scanning speeds.
It occured to us when first loading the holder with film that, due to the plastic retainers of the glass cover, the film hovers some micrometers over the cover. The platic retainers serve as bar spacers, making it impossible to flatten out the film by applying pressure.
To reduce potentially visible dust particles, all film holders featuring glass layers should be cleaned beforehand loading with film material. Once the holder has been equipped and snapped shut, it can be placed on the scanner glass. Then, the prescan can be started through the software.

It comes as no real surprise that the film holder for 4x5 inch material is constructed equipollent to the other film holders - featuring glazing. If smaller or bigger formats (up to 203 x 254 mm) are to be scanned, they need to be placed directly onto the scanner glass. The film holder of the V700 used to hold up to two 4x5 inch pictures and is a good alternative in terms of efficiently using the scan area.
If you would like to make use of the entire transparency area, you should keep in mind that the dust- and scratch correction ICE can not be used in EpsonScan (the same goes for the equivalent iSRD in SilverFast). When choosing field guideline in EpsonScan or the corresponding "transparency big" in SilverFast, these functions are automatically greyed out. Hence, the hardware based dust- and scratch correction can be deployed only for formats up to 14.9 x 23.9 cm, matching the maximum distance of the film holder's snippets.
The same holds true for scanning medium and large formats that goes for small formats: to yield better results, we advise the use of the old film holders. Get them, while stocks last! The Epson medium format film holders can even take two film strips, which means you can scan double as many pictures per batch. The glassless Epson large format film holder can do two instead of one picture per batch. And last but not least, there's the huge 8x10 inch large format film holder.
Scanning of photo prints and reflective originals with the Epson Perfection V800 Photo
Actually, the main task of a flatbed scanner such as the Epson Perfection V800 Photo, is the digitization of reflective originals and photo prints. Since we are mainly interested in scanning film material, we will only cover the scanning of reflective originals on in the margins. Scanning of plain documents is a standard task nowadays, which even scanners in the price range of unter 100 &euro can handle without effort. Scanning photo prints on the contrary demands higher quality. In this regard, the Epson Perfection V800 Photo leads a trump - which is why, after all, he earns the term Photo. The results obtained when scanning paper prints with the Epson V800 Photo are in fact really good, the quality is fine. It's a nice way to get digital pictures of the beloved old paper prints.

Scanning of paper prints with the Epson V800 is just as simple as with other flat bed scanners. Before scanning reflective material, the white cover is in place, capping the transparency unit in the lid of the device. Then, the pictures are placed upon the scanner glass, the lid is closed and the prescan started. Especially the auto frame detecting and alignment function is very handy here. Thanks to this function, the user does not have to pay attention to proper alignment of the images on the scanner glass, which considerably accelerates the overall scanning. You can see how it works when clicking the small picture to the side, the animation that opens will illustrate. With just a few clicks of the mouse, the frames are set, settings can be applied on all picture in unison. Let the scanning begin!
Especially if lots of small paper prints need to be scanned, the automatic frame detection and aligning in SilverFast SE Plus comes in handy and considerably speeds up the scanning progress, notably because the manual aligning of pictures on the scanner glass is very time consuming.
SilverFast SE Plus and Ai Studio offer a special feature, namely the automatic frame detection and - alignment.
Save yourself some post production time and calibrate your scanner before scanning paper reflectives. It's child's play with one of these IT-8 reflective targets. The color abberations of scanner are hereby automatically measured and safed in a profile. From there on, color errors will be auto-compensated.
Scan-Software for the Epson Perfection V800 Photo
By default, the Epson Perfection V800 Photo comes supplied with Epsons EpsonScan scanning software and SilverFast SE from LasersoftImaging. This means you get two scanning programs that can be installed and used independently. Optionally available are higher class scanning programs such as SilverFast SE Plus or SilverFast Ai Studio.
EpsonScan
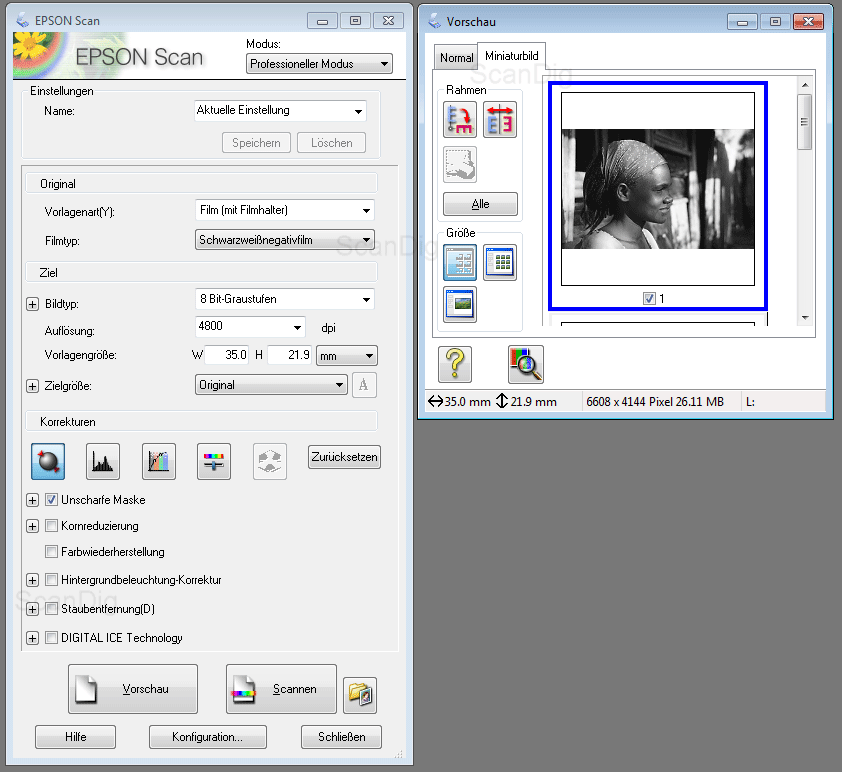
The scanning software EpsonScan is part of the standard box contents and offers three scanning modes: fully automatic, standard and professional. The fully automatic mode is intended mainly for office use then for scanning foto and film material. The standard mode offers some good means for scanning foto and film material, especially for amateurs. The different types of templates are explained in a basic way. In addition, example images help to quickly grasp the functions and start off without much initial training.

In this mode, the following settings can be made when for transparency scanning: color restauration, backlight correction, automatic dust- and scratch correction, brightness and contrast. For reflective scanning, descreening and text-optimization and auto detection of text and images are additionlly available. First, the pre scan is run. Here, the user can choose betwen tumbnail (where the image details have to be chosen right away) and the normal view, showing the entire scanning area. In the miniature view, it's not necessary to set up the scan frames.
In the "normal" view, the scan frames can be fit through left clicking and drawing. They can later be adjusted in height and width. For this purpose, the cursor is placed on the dashed line of the frame until an arrow with two heads pops up. While left-clicking, the size of the frame can now be changed in either direction the arrows are pointing. The settings can then be applied to all current scan frames by first pressing the button "all", which is located left of the preview image. All changes made after will be applied to all scan frames. Then, the scanning of all frames can be started throught the button "scan".
Depending on the setting, now the settings are polled for saving the files. Here, the user may choose between several file formats, such as Bitmap, JPG, TIF and PDF. Also, the file name and the saving location can be chosen. Click "OK" and the scan will commence. If PDF is chosen as file format, the user may optionally add more pages at the end of the scan. This function is suitable for documents.
If you prefer to deal with the adjustment options to gain more influence over the scan result, use the professional mode. You will notice some additional functions when switching from another mode, such as adjustment of levels and histograms and a means of sharpening and reducing grain. Also, professional mode offers the ability to save to TIF format with 48bit.
If you click on the adjoining picture, a new tab will open showing an animation. In this animation, all available settings of the professional mode of EpsonScan are illustrated. Initially, the prescan is run, just like in other modes. The procedure then differs only in regard of possibilities of image optimization and the depiction of the settings. Besides all the image formats of the standard mode, the professional mode also offers Multi-TIF, which is a multi-page document.
SilverFast SE
Another boxed component is the SilverFast SE software. So, the Epson Perfection V800 Photo comes with two scanning software variants. Compared to the professional mode of EpsonScan, SilverFast offers almost identical features. The only exception is the option to create files with a depth of 48 bit in RGB color or 16 bit grayscale. In SilverFast SE, this is possible only when saving to HDR RAW file format which means the SilverFast HDR software is needed to then post process the images.

SilverFast has two advantages over the EpsonScan software. One: for scanning negatives, there's the NegaFix dialogue, offering presets suitable for the respective film type. Let's say you're about to scan a Kodak Portra NC 200 color negative film. Just choose it from the dropdown menu in the NegaFix dialogue and SilverFast will automatically use the ideal color- and contrast settings for this film. Such functionality is not given in EpsonScan. The other advantage of SilverFast is its ability to turn scanning frames, which makes it possible to scan pictures which are off plumb perfectly, abandoning the need to cut and trim afterwards. This advantage takes effect only with reflective material though, that is lying loose on the scanner glass and has not been aligned properly. SilverFast Ai Studio will give the user a further quality enhancement, as we will show oyu in the chapter "image quality with SilverFast Ai Studio".
SilverFast SE is not a real alternative to EpsonScan. While EpsonScan shines mostly with its office mode for scanning documents, SilverFast SE plays off its advantages once it comes to scanning film material, in particular, negatives.
SilverFast SE Plus, SilverFast Ai Studio, SilverFast Archive Suite
The Epson Perfection V800 Photo is optionally available with higher-end SilverFast Versions. Version SilverFast SE Plus is only a few Euros more than SilverFast SE. SilverFast SE Plus offers a number of additional functions compared to the simple SE-Version. The most important of which is the Multi-Exposure-Function. When activated, the film material is being scanned twice; once slightly overexposed, and once slightly underexposed. The software then calculates the ideal, midpoint image, which will be perfect in terms of contrast. This multi-exposure is especially advantageous in case of film material with a high dynamic range, such as for example a sunset. Detailed information on multi exposure scanning can be found on our SilverFast page, in the section Multi-Exposure.
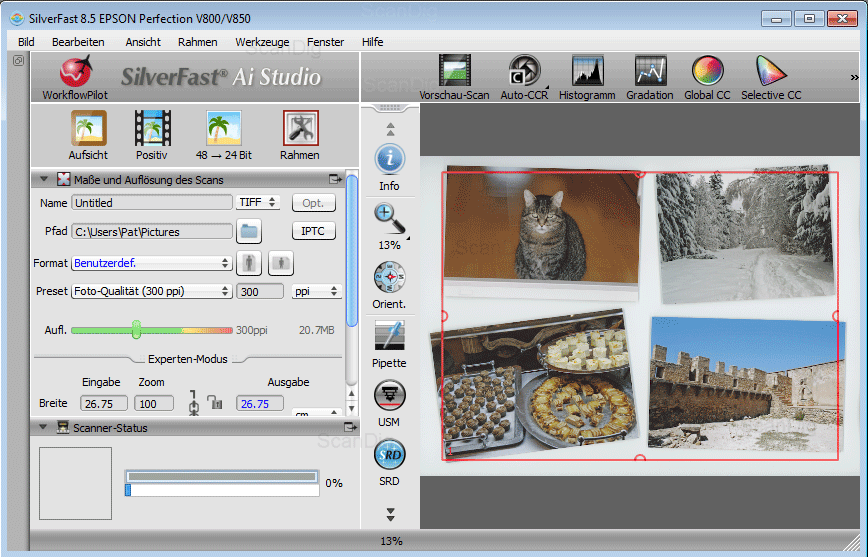
For the Epson Perfection V800 Photo, the professional scanning software SilverFast Ai Studio is available, too. With a price of about 300 € (stand-alone), it makes sense to get it bundled with a scanner, as it's much cheaper this way. It's a professional scanning software, in fact, it has been the market leader for umpteen years, available for countless scanner models. Its professional user interface features an extensive range of settings to get the best out of the device.
One special feature of the SilverFast Ai Studio software is the possibility of IT-8 color calibration. The producer, LasersoftImaging offers many suitable IT-8 Targets, for calibrating the scanner conditional to the respecitve film or print material. Once the device is color calibrated, it will spare the user a massive amounts of time that would otherwise be needed for post production. Extensive information on color calibration can be found on our pare scanner-calibration. In the following chapter image quality, we will showcase the tremendous quality impovements resulting from the proper use of SilverFast Ai Studio.
Concluding, we would like to point to the SilverFast Archive Suite Version of SilverFast, which also exists for the Epson Perfection V800 Photo. In this product, the SilverFast Ai Studio software is completed by the SilverFast HDR Studio software. With these two software products, the user can make raw scans and perform scan settings and optimizations afterwards, on the basis of the raw material. This allows for a separation of the actual scanning from the image optimization. Extensive information on the possibilities of raw scans can be found on our page SilverFast HDR.
Image quality of the Epson Perfection V800 Photo
The nominal resolution of the Epson Perfection V800 Photo is 6400 ppi. The fact that this value can not nearly be reached has already been proven based on the predecessor model, the V700 Photo, which reached less than 40% of the nominal 6400 ppi. Now, let's see if the Epson Perfection V800 Photo yields better results than its precursor. We will test it by doing a resolution test using a USAF-1951 test chart (see also our website article on the matter resolution):
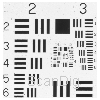
In the scan our our USAF-test chart at 4800 ppi resolution (left image), the horizontal lines of the elements 5.3 and the verical lines of the element 5.5 can just be distinguished. According to our resolution chart, this equals an effective resolution of about 2300 ppi. Compared to the set resolution of 4800 ppi, the Epson Perfection V800 Photo yields 48% of its nominal resolution. The predecessor V700 delivers an effective 2300 ppi as well, which equals 40% of the nominal 6400 ppi. If scanning a picture with Epson Perfection V800 Photo at 6400 ppi resolution (picture to the right), no effective increase in resolution is reached. By scanning at 4800dpi, the image files are not as bloated as they used to be with the predecessor. In terms of resolution, nothing has changed comparing to the V700.
What does an effective resolution of 2300 ppi mean for a 35mm frame? If scanning at this resoltution, you will get a file with about 3200x2100 pixels. This is equal to 6,7 mega pixels and can be printed at 300 dpi to a size of roughly 27x18 centimeters. Thus, an A4 print is barely possible. Smaller prints are easy, as is viewing on the computer or television screen. If you scan a 6x6cm medium format, the output size will be considerably bigger: Due to the bigger input size, the scan at 2300 ppi will yield a file of about 5400x5400 pixels, which equals 29 mega pixels. This means you can print up to a size of 46x46 centimeters at 300 dpi, making large format prints perfectly possible.
If you run a resolution test with the professional scanning software SilverFast Ai Studio, you will notice an incredible result: the horizontal lines of the elements 5.4 and the vertical lines of the elements 5.6 can still be differentiated. According to our resolution chart, this equals an effective resolution of about 2600 ppi. That's right, the Epson Perfection V800 Photo yields 13% more resolution when scanning with SilverFast Ai Studio than it yields when scanning with Epson scan! After all, more than 50% of the adjusted nominal 4800 ppi are reached, which is particularly handy for scanning small format material as every pixel counts to get bigger sized prints with this rather small input format.
The Epson Perfection V800 Photo yields an effective resolution of 2300 ppi if the template is scanned with 4800 ppi. Using the professional scanning software SilverFast Ai Studio, this value is increased to an effective 2600 ppi.
What does the increase of scanning resolution mean in real life? Let's say you're scanning a 35 mm frame at 2600 ppi - you will get a file of about 3600x2400 pixels (or 8.6 mega pixels). You can then print this file at 300 dpi up to a size of 31x20 centimeters. A DIN is thus no problem. Another example: Let's say you are scanning a medium format, 6x6cm frame. The resulting file will measure 6100x6100 pixels (or 37 mega pixels). Accordingly, the output format at a printing resolution measures 52x52cm. Alltogether, SilverFast Ai Studio retrieves about 30% information from a film template than EpsonScan and SilverFast SE.
The Epson Perfection V800 Photo cannot compete with proper film scanners such as the Reflecta RPS 10M, which yields an effective 4300 ppi for small format films, or the Reflecta MF5000, which manges to pull 3050 ppi from a medium format. Unless you are planning large-size prints, however, you will be fine with the 2300 or 2600 ppi of the Epson. For better understanding: the output of 6.7 - 8.6 mega pixels of the Epson matches the resolution of current smartphone cameras.
Image quality of the Epson Perfection V800 Photo in conjunction with SilverFast Ai Studio compared to EpsonScan
As ascertained earlier, the effective resolution of the Epson Perfection V800 Photo can be raised by the use of SilverFast Ai Studio by about 300ppi. The same goes for image quality. With a professional scanning software such as SilverFast Ai Studio, one can tap the full potential of the scanner. You will get additional features such as Auto-IT-8-calibration, the expert-mode, saving of custom frame-sets, using layers and masks for dust- and scratch correction, and editable profiles for the NegaFix-dialogue.

Let's compare the scans we obtained from SilverFast Ai Studio to those gotten from EpsonScan in terms of image quality. In the first picture, we will show the differences of the automatic dust- and scratch correction. EpsonScan uses its ICE-technology while SilverFast makes use of its iSRD-technology. Both variants essentially do the same thing; the infrared channel of the scanner detects particles and scratches on the film material. If you click on the adjoining picture, the view will alternate between the scan with and the one without dust- and scratch correction and the scan with ICE and the one with iSRD. It's obvious that the ICE-technology used by EpsonScan leaves the one or other dust particle in the picture. For better illustration, we circled these with a read line. The three large particles were successfully removed only by SilverFasts iSRD.
This result is baffling insofar, as the ICE-technology has been around since decades and usually it delivers very good results, for exapmle with the almost legendary Nikon film scanners. The poor results reached with the Epson Perfection V800 Photo indicate that some mistakes must have been made when implementing the ICE-technology into EpsonScan. It is really the only valid explanation as the infrared channel of the Scanner works flawlessly, as can be seen in the scans made with SilverFast Ai Studio, which also uses the infrared channel.
The automatic dust- and scratch correction of Epson Scan is decent. SilverFast Ai Studio is flawless.

Our next comparison picture shows the differences in brightness rendering. If you click on the alongside picture, an animation will open, comparing the Scans of SilverFast Ai Studio and EpsonScan. At first glance, you probably won't notice too much of a difference. But we marked some parts in the third image of the sequence, where you will notice that Epson scan is lacking detail. It's especially visible in the bright parts of the coats of the people. The transition from the sleeve to the body is barely recognizable. Such effects occur with many flatbed scanners as well as simple film scanners, where the hardware does not deliver sufficient dynamic range or the scan software does not retrieve the maximum information from the scans.

Anyone would think that the differences cannot possibly be that grave when comparing black-and-white negatives. But our next example proves this wrong. Through the use of the NegaFix-dialogue in SilverFast, scans turn out buch better in contrast. Click the accompanying picture to see an interchanging animation, comparing the two scans. The scan obtained from EpsonScan seem dark and dull. There is barely any detail left in the trees in the background. Everything seems to vanish in the blacks, even the texture of the concrete in the foreground resembles a plane, grey surface. The results coming from SilverFast Ai Studio, using the NegaFix-profile for this specific film (Kodak Tmax 100), are - conversely - very detailed. The firs in the background, the grainy structure of the concrete - all is clearly visible. Overall, the image has a contrasty and thus much sharper look to it than the image from EpsonScan.
Naturally, this was a lame comparison since EpsonScan does not have the film profiles with integrated contrast values at command, but can only scan and leaves the user with several tools for optimizing the image on the basis of the prescan image. But it's these comfort features that distinguish an outstanding scan software from the rest.
In the SilverFast Ai Studio software, the NegaFix-profiles can be edited and custom profiles can be created. This way, even if your particular film is not listed, as is the case with eg. Orwo films, you can create your own NegaFix profile and use it again later on. This feature proves to be handy as well in case of old film material with faded color information. If you wish to scan slides, however, you can go with the very comfortable IT-8 calibration.

By IT-8 calibrating the scanner, you will calibrate it for a specific type of film. For this purpose, you have to purchase so-called Targets in addition to the software. They are available in various sizes for different film formats. The IT-8 calibration itself can be accomplished within seconds with just a few mouse clicks. In the course, the color deviation of the scanner is being measured and saved in a correction profile. This correction profile will then be administered with every following scan. For different film types such as Kodak, Fuji or Kodachrome, a respective correction profile may be created and chosen. The huge advantage of the IT-8 color calibration is the correction of the color deviation each and every scanner suffers. It spares the user sheer endless post production time for all succeeding scans. In the following chapter, we scanned a kodak medium format with and without IT-8 calibration. In the uncalibrated version, the dark areas are rather bluish, and the house is even greener from the shine of the lantern then it should be in tungsten light. The scan with IT-8 calibration seems more natural in terms of colors.
An IT-8 color calibration centrally corrects the color deviation of the scanner, saving the user sheer endless post production.

Epson states the density range of the Epson Perfection V800 Photo to be DMax=4.0 - not too high a value. You can up this by using the MultiExposure of SilverFast SE Plus and SilverFast Ai Studio. The image will then be read twice, with different exposure. As a result, bright sections will have more detail and don't burn so easily, while the same goes for the blacks of the image. In our example which we scanned with a glassless film holder to avoid light loss, the dark sunrise is still visible when scanned with multi exposure. The dark areas in the foreground still show detail while the clouds in the background are not yet burning out. Sadly, the dynamic range of the Epson does not suffice, which is why some nuances of detail are inevitably lost, even with ME.
The multi-exposure function in scanning is equivalent to HDR-shots in digital photography. The advantage of scanning though is, that the motif, ie. the film original, is fixed, resulting in two congruent scans which can be easily matched to one contrasty image by the scan software.

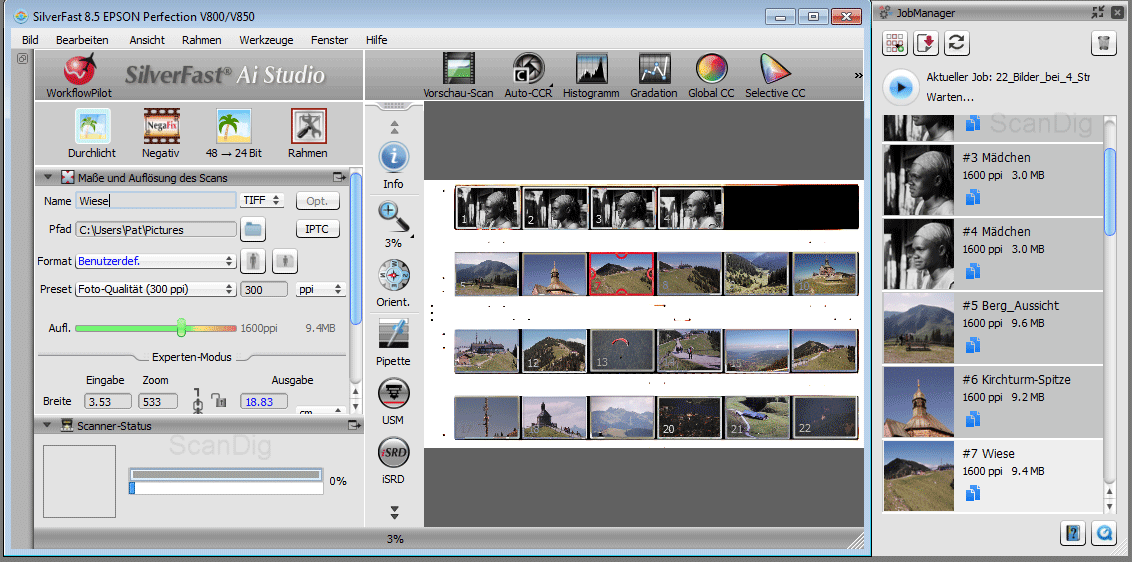
One feature is especially convenient for scanning large amounts of film strips, namely the Jobmanager. It's a component of the SilverFast Ai Studio Software and empowers the operator to batch-apply settings to pictures. In addition, custom names may be chosen for the individual pictures, even though the subsequent scanning will be fully automatic batch scanning (this means that the images needn't be named schematically). As can be seen in our expample picture, the film holder can be filled with a mix of black-and-white film and color material and then be batch-scanned. The scanning order can be set via drag&drop, which is very benefitial in case one is using the film holders of the predecessor model, Epson Perfection V700 Photo. The JobManger does not impact on the image quality, it does though make scanning more convenient. The types of settings which can be applied via the JobManager can be seen when clicking on the thumbnail. The following animation will illustrate the possibilities of the JobManager.
Concluding, we state that the Epson Perfection V800 delivers good results when operated through EpsonScan or SilverFast SE. Image quality can be increased when using SilverFast Ai Studio and performing an IT-8 calibration.
The surcharge for the Epson Perfection V800 Photo with SilverFast Ai Studio ranges in the scal of 150 € and 200 €. One has to think twice whether this surcharge is worth its money. After all, it means much better image quality. The surcharge for the SilverFast SE Plus version on the other hand accounts for only about 50 €. For this acceptable value, one gains the multi-exposure-function, which alone caues a considerable improvement in image quality. So, all in all, we give a definite recommendation for the Epson Perfection V800 Photo with SilverFast SE Plus.
Scanning speed of the Epson Perfection V800 Photo
To determine the scan times, the scanner was connected via USB 2.0 to a computer featuring an i3 processor and 8GB RAM. The following table reflects measuring results for scans with EpsonScan and SilverFast Ai Studio:
| Procedure |
duration without ICE (EpsonScan) |
duration without iSRD (SilverFast) |
duration with ICE (EpsonScan) |
duration with iSRD (SilverFast) |
| preview reflective light |
0:11 min |
0:06 min |
- |
- |
| preview tranmitted light |
0:24 min |
0:30 min |
- |
- |
| 35mm positive scan at 2400 ppi resolution |
0:44 min |
0:39 min |
2:04 min |
1:17 min |
| 35mm positive scan at 4800 ppi resolution |
1:16 min |
1:03 min |
2:58 min |
2:42 min |
| 35mm positive scan at 6400 ppi resolution |
1:41 min |
1:23 min |
3:21 min |
3:49 min |
| 35mm negative scan at 2400 ppi resolution |
0:44min |
1:10min |
2:29 min |
2:34 min |
| 35mm negative scan at 4800 ppi resolution |
1:38 min |
1:44 min |
3:44 min |
4:13 min |
| 35mm negative scan at 6400 ppi resolution |
2:36 min |
2:27 min |
4:34 min |
5:44 min |
| 6x6cm medium format scan at 2400 ppi resolution |
1:15 min |
1:34 min |
4:29 min |
3:26 min |
| 6x6cm medium format scan at 4800 ppi resolution |
2:17 min |
2:48 min |
8:23 min |
19:21 min |
| 4x5" large format scan at 2400 ppi resolution |
4:36 min |
4:05 min |
14:53 min |
10:11 min |
| 4x5" large format scan at 4800 ppi resolution |
9:56 min |
61 min |
22:39 min |
132 min |
| 10x15cm photo print at 600 ppi resolution |
0:14 min |
0:18 min |
- |
- |
| 10x15cm photo print at 1200 ppi resolution |
0:59 min |
1:20 min |
- |
- |
What do these scan times mean in the field? If one scans with a small format slide holder equipped with 12 slides, at 4800 ppi and dust- and scratch correction turned on, the scanner will need about 35 minutes after starting EpsonScan, respectively 32 minutes after starting SilverFast. For negatives, it's roughly double the amount of time. Another case: scanning 18 small format negatives at 4800 ppi with dust- and scratch correction turned on, the scanner has to be re-loaded after 67 minutes when scanning with EpsonScan, respectively 1 hour and 15 minutes using SilverFast. If you'd like to optimize the batch scanning, you may use the film holder of the Epson V700 which will then give you 24 images per batch, meaning the scanner will be busy for at least 90 minutes, ie. one entire soccer match. Digitizing an entire film of 36 images, will take about 2 hours with the Epson Perfectio V800 Photo. The choice of scanning software plays only a minor part in terms of scan times.
If we compare these scanning times to those of a Reflecta RPS 10M, which can handle an entire film roll of 36 images at once, the Epson Perfection V800 Photo is about half an hour faster (as the Reflecta RPS 10M takes about four minutes per image). Yet, the Reflecta delivers more resolution - at an appointed resolution of 5000 ppi, it will yield an effective 4300 ppi.
For medium formats, the Epson Perfection V800 Photo needs about ten minutes for a film holder filled with three 6x6cm images, that is, when scanning at 2400 ppi and iSRD turned on in SilverFast. Let's double the resolution? We now have to wait an entire hour for the scanning process to complete. In this case, you may want to use the film holders of the predecessor model, since this way you can batch process double as many pictures at once, giving you a solid two-hour break.
Scanning large formats will score the longest scanning times and - naturally - generate the biggest image files. If you refer to the chart, one scan of a 4x5" image can well take up to two hours. The resulting image file, saved in TIF format with a color depth of 24Bit, has a size of 1.3GB. Double the color depth, and the file will be double as big. These vast image files can be tough to handle even for high performance computers. At a scanning time between 4 and 15 minutes at 2400ppi, you'll get yourself an image file of 9600x12000 pixels (a solid 115MP). Since such files are suited for large-scale prints with a size of up to 80x100cm, you may as well spare yourself the extremely long scanning times and vast file sizes.
Insgesamt lässt sich sagen, dass die Scanzeiten des Epson Perfection V800 Photo in Ordnung sind. Bei Einzelscans wartet man zwar einige Minuten bis man seine Digitaldatei hat, aber dank der Möglichkeit mehrere Bilder auf einmal zu scannen kann man den Scanner längere Zeit alleine arbeiten lassen ohne dass man einschreiten muss.
Abschließend sei noch gesagt, dass das Scannen von kleinen Papierfotos so schnell geht, dass es sich nicht mehr lohnt, den Schreibtisch zu verlassen während der Scanner arbeitet.
Conclusion, summary
The Epson Perfection V800 Photo differentiates itself from its predecessor V700 Photo in only one aspect: it makes use of LEDs. Scanning and image quality are not affected by this. The significant difference between the two devices lies in the film holders. The film holders of the Epson Perfection V800 Photo are adjustable in height, which helps to deal with potential focus problems. This is a real advantage compared to the predecessor model. However, the glass covers of the film holders are disadvantageous for everyday scanning, as they have worsen image quality.
The image quality of the Epson Perfection V800 Photo is perfectly ok when operated with the enclosed EpsonScan or SilverFast SE. Thanks to the Multi-Exposure-function of SilverFast SE Plus, it can be considerably enhanced. If you want maximum image quality from this device, you might want to consider the professional scan software SilverFast Ai Studio which offers IT-8 color calibration, which is available as a bundle in our shop ). The maximum effective resolution of 2300 ppi means image files of about 6.7 megapixels for 35mm films - perfectly adequate for common use. Albeit, top film scanners will yield 20 megapixels. Mind you, SilverFast Ai Studio will reach an effective resolution of 2600 ppi, yielding image files with 8.6 megapixels.
We deem well of Epsons development of new film holders featuring glass covers. However, these should be supplied as additional accessories rather than standard delivery contents. For regular scanning, we advise the use of the glassless film holders of the previous model. Only for tricky cases, such as arched or waved film material, do we advise the new film holders with glass covers.
Back to the film scanner tests index
|
)
)
)
)
)
)
)
)
)
)
)

)
)
)
)
)
)
)
)
)
)
)
)
)